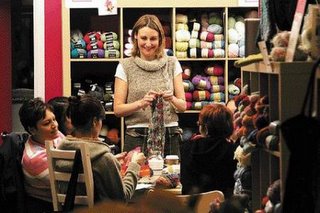
My Project Class often attracts new knitters. And I love them.
My Project Class is a multi-week guided workshop. The idea is that knitters bring a project that is a personal challenge, and I equip them with the skills and knowledge to complete it.
I see a broad range of experience and skills levels in the class. We see seasoned knitters looking to stretch themselves and tackle something they've never tried before, like lace or socks. We get new knitters fresh from beginner classes looking to try an actual project. And there are always self-taught knitters (thanks to the internet!) who have made a million scarves and need something more exciting.
I love this environment - lots of different projects on the go, lots of different skills levels. The more experienced knitters provide encouragement and share skills with the newer knitters, and the newer knitters bring a level of excitement and enthusiasm for their new passion that the more experienced knitters often find inspiring.
Teaching the class is inspiring to me, too. I get to vicariously enjoy the projects my students make, and it never ceases to thrill me to see a student's pride and amazement in her (or his) own work.
I, too, learn lots from the class. I get to see and read a lot of patterns, and I believe it's made me a better writer of patterns and technical editor. I see what sorts of instructions make sense and are clear, and what sorts of instructions create more questions than they answer. (I have been known to get cranky about a pattern - I get frustrated on behalf of all knitters when I see a poorly-written pattern. If a pattern isn't well written, a knitter is less likely to be successful and enjoy the process. And an unsuccessful knitter is an unhappy knitter, and an unhappy knitter is very likely become a non-knitter. And this makes me sad.)
And I learn from knitters what's easy, and what's not.
In a recent project class, I had a student who we shall call Daphne. Daphne had taken a beginner level class, and was feeling very confident about knitting and purling, and had chosen a great starter-level project: a headband worked in (k2, p2) ribbing. Easy, right?
Poor Daphne was completely at sea.
The instructions were fine: Row 1 [RS]: *K2, p2; rep from * to end of row.
But she couldn't figure out why she had so many stitches at the end of a row, and that everything looked so very tangled up.
I laughed when she showed me... in sympathy and recognition. I remember this so very well.... in my case it was (k1, p1) ribbing.
Oh yeah, very easy... knit a stitch or two, purl a stitch or two. But nowhere in the instructions do they tell you that you have to MOVE THE DAMN YARN.
She's on the right track now.
Thursday, March 10, 2011

Tuesday, March 01, 2011
Design Your Own Fair Isle Wristwarmer Workshop
Last weekend I was honoured to host a workshop for the Kitchener Waterloo Knitters' Guild.

2011 is the year of colourwork for the KW Guild, and the topic of my workshop was Fair Isle. In the workshop, we learnt some things about Fair Isle designs and the history of the technique.

We practiced techniques for knitting with two colours - one-handed and two-handed.

And we spent the afternoon designing our own Fair Isle wristwarmer patterns!

I had a ton of fun - and I think the participants had a good time, too.
The participants are posting their progress on Ravelry already, and I love seeing the results.

These are SweetG's mitts-in-progress. More photos on the KW Guild Flickr stream, and in Ravelry.
(All other photos in this post courtesy Suzanne Carter-Jackson.)

2011 is the year of colourwork for the KW Guild, and the topic of my workshop was Fair Isle. In the workshop, we learnt some things about Fair Isle designs and the history of the technique.

We practiced techniques for knitting with two colours - one-handed and two-handed.

And we spent the afternoon designing our own Fair Isle wristwarmer patterns!

I had a ton of fun - and I think the participants had a good time, too.
The participants are posting their progress on Ravelry already, and I love seeing the results.

These are SweetG's mitts-in-progress. More photos on the KW Guild Flickr stream, and in Ravelry.
(All other photos in this post courtesy Suzanne Carter-Jackson.)
Friday, February 25, 2011
Combination Knitting
A couple of weeks ago I posted about Continental Knitting. I've had some great feedback about the Norwegian purl - happy to have helped out some knitters with a new skill.
I've been doing a lot of colourwork recently, and I love the speed I can get by stranding colours with two hands.
When I wrote that post, I mentioned Combination Knitting. I should explain myself, I figure.
It's pretty clear that Norwegian or not, the purl stitch can be cumbersome in Continental knitting.

Some knitters approach it another way - they just wrap the purl stitch the "easy" way.

This results in stitches that are oriented the "wrong" way on your needle. Normally, the right leg of the stitch is at the front of the needle. The result of an "incorrect" purl wrap is that the left leg of the stitch is at the front of the needle. You can see this on the following right side row...

If, on the following row, you were to knit this normally - through the front loop - the resulting stitch would be twisted. Twisted stitches are generally undesirable, as they look different, and they tend to tighten up your knitting. (There are times that twisted stitches are used for effect - often in a twisted ribbing, which is tidy and tight and has a terrific corded look.)
How to compensate for mis-oriented stitches? Knit them through the back loop!

Seriously! It's that easy!
That's Combination Knitting.
Now - some caveats. It's most appropriate for stocking stitch worked flat. For garter stitch, or stocking stitch in the round, you're only knitting, therefore only wrapping the usual way, so the stitches end up oriented the usual way and so you will need to work them the usual way.
In addition, when working Combination style, because your stitches are oriented the other way on the knit side, you need to compensate in your decreases: for a "normal" Western knitter, k2tog leans to the right, for a Combination knitter, k2tog leans to the left. In many situations this doesn't matter, but in applications like lace, it can make an unholy mess.
A skilled combination knitter knows that when there's a k2tog in the pattern, you need to work an ssk, and when there's an ssk called for, you need to work a k2tog.
The name refers to the fact that it's a combination of the standard Western way of knitting - the method that most Western Europeans and North Americans learn, and the Eastern Method, common in Far Eastern Europe and the Near/Middle East.
The goddess of Combination Knitting is Annie Modesitt. Learn more at her website.
When worked with the yarn in your left hand, Continental style, the Combination Method is screamingly fast. Annie tells a terrific story about a yarn shop owner accusing her of lying because of the speed with which she finished her first sweater project.
In fact, Ms. Modesitt offers a free online class in the technique - more info here.
Give it a go - you may surprise yourself!
I've been doing a lot of colourwork recently, and I love the speed I can get by stranding colours with two hands.
When I wrote that post, I mentioned Combination Knitting. I should explain myself, I figure.
It's pretty clear that Norwegian or not, the purl stitch can be cumbersome in Continental knitting.

Some knitters approach it another way - they just wrap the purl stitch the "easy" way.

This results in stitches that are oriented the "wrong" way on your needle. Normally, the right leg of the stitch is at the front of the needle. The result of an "incorrect" purl wrap is that the left leg of the stitch is at the front of the needle. You can see this on the following right side row...

If, on the following row, you were to knit this normally - through the front loop - the resulting stitch would be twisted. Twisted stitches are generally undesirable, as they look different, and they tend to tighten up your knitting. (There are times that twisted stitches are used for effect - often in a twisted ribbing, which is tidy and tight and has a terrific corded look.)
How to compensate for mis-oriented stitches? Knit them through the back loop!

Seriously! It's that easy!
That's Combination Knitting.
Now - some caveats. It's most appropriate for stocking stitch worked flat. For garter stitch, or stocking stitch in the round, you're only knitting, therefore only wrapping the usual way, so the stitches end up oriented the usual way and so you will need to work them the usual way.
In addition, when working Combination style, because your stitches are oriented the other way on the knit side, you need to compensate in your decreases: for a "normal" Western knitter, k2tog leans to the right, for a Combination knitter, k2tog leans to the left. In many situations this doesn't matter, but in applications like lace, it can make an unholy mess.
A skilled combination knitter knows that when there's a k2tog in the pattern, you need to work an ssk, and when there's an ssk called for, you need to work a k2tog.
The name refers to the fact that it's a combination of the standard Western way of knitting - the method that most Western Europeans and North Americans learn, and the Eastern Method, common in Far Eastern Europe and the Near/Middle East.
The goddess of Combination Knitting is Annie Modesitt. Learn more at her website.
When worked with the yarn in your left hand, Continental style, the Combination Method is screamingly fast. Annie tells a terrific story about a yarn shop owner accusing her of lying because of the speed with which she finished her first sweater project.
In fact, Ms. Modesitt offers a free online class in the technique - more info here.
Give it a go - you may surprise yourself!
Thursday, February 24, 2011
Spring Creativ Festival: Talks

Are you planning on attending the Spring Creativ Festival in Toronto, running April 15th & 16th?
I'm there on the Friday, giving three free 45 minute knitting talks.
Yarn Knowledge Mystified by all these terms - double knitting, worsted, aran? Unsure whether fingering is a potato or a yarn? Wondering why you should care about whether a yarn is superwash or not? This session will explain yarn terminology, help you understand yarn substitution and gauge, and make you a more confident yarn shopper and knitter.
Cast Ons & Cast Offs Improve your knitting and expand your knowledge by trying and adding some new cast-ons and cast-offs to your repertoire. See which cast-on is best for different types of projects. Plus, Kate shares tips to help you achieve that elusive loose cast-off.
 Fibre Care You’ve spent a lot of time knitting or crocheting your garment, now let’s make sure it stays beautiful forever. Discover how to properly wash and store your finished items, whether wool, cotton or a man-made fibre. Kate Atherley will explain all those strange symbols on the yarn labels, share tips for moth-proofing and show you how proper fibre care can improve the look of the finished items. Samples for everyone courtesy of my good friends at Soak.
That's right - I'm free with admission! And with goodies for all! If you're there, come by and say hello.
Monday, February 21, 2011
Baby Clark with all his Knits

Congrats to E., a student of mine, whose son Clark was born recently. Over the second half of last year, E. attended my project classes, quietly knitting up a storm for the baby-on-the-way.
The bonnet is my Heirloom Bonnet With Ears.
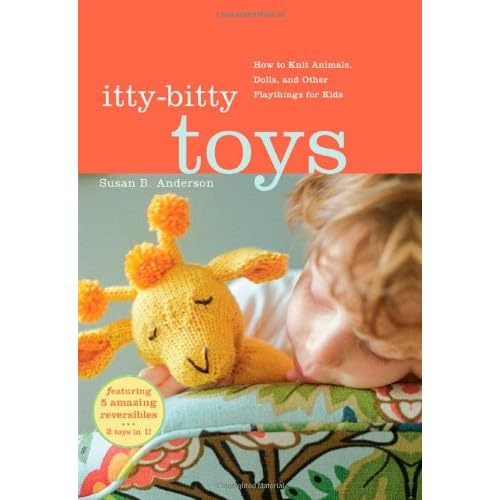
The gorgeous hippo comes from the book Itty-Bitty Toys. This is a seriously great book - all the patterns are adorable, and knitting toys is a great skill-builder for adventurous knitters. There's working in the round, increasing, decreasing and various assembly techniques - all in small, quick-knit, supremely cute projects.
Tuesday, February 15, 2011
The Sock Drawer Project
It's no secret that a) it's cold where I live, b) my feet get cold very easily, and c) I love knitting socks.
A couple of weeks ago I finished a pair of socks made with Berroco Ultra Alpaca Fine.
 I've been wearing them as often as possible - hand-washing them at night rather than waiting for the weekly darks load - to test how they wear.
The yarn is a terrific blend - 50% wool, 30% nylon to keep them hardwearing - and this is the important bit - 20% alpaca for warmth. And holy cow, they are indeed very warm. And they're wearing well, too. The yarn has "fuzzed up" a little, but I don't mind.
Because of my cold feet, I layer socks. Between November and March I wear two pairs of socks every day - a thin store-bought pair of black wool socks under a (typically brightly coloured) hand-knit pair. The inner socks are a fine ribbed sock, very much like a men's dress sock, that I found at Simon's in Montreal some years ago. They're absolutely brilliant, and over a few business trips I bought myself 12 pairs. After 8 or 10 years, a couple have gone missing, and the rest are starting to wear out. I put a call into a friend in Montreal, but he wasn't able to find them for me.
(And yes, this means that I buy my winter shoes in a size larger than my summer shoes.)
I was starting to worry about what my sock layering strategy would be... but then I finished this pair. It hadn't occurred to me that I could knit the inner-layer socks, because I wasn't sure I could make them fine enough to fit under another pair. But this yarn is my answer!
The Berroco Ultra Alpaca Fine is indeed quite fine - finer than most other sock yarns I've worked with. I knitted these socks snug (knowing that they'd be very stretchy because of the alpaca content), and they have turned out to be the ideal inner layering sock.
 So now I have cooked up a plan.
I'm going to buy up a whole ton of this yarn and knit myself a whole new set of layering socks. Once I've finished up the two brightly coloured pairs currently on my needles, it's nothing but plain black socks for a while. By the time next winter rolls around, I should be ready.
A couple of weeks ago I finished a pair of socks made with Berroco Ultra Alpaca Fine.
 I've been wearing them as often as possible - hand-washing them at night rather than waiting for the weekly darks load - to test how they wear.
 The yarn is a terrific blend - 50% wool, 30% nylon to keep them hardwearing - and this is the important bit - 20% alpaca for warmth. And holy cow, they are indeed very warm. And they're wearing well, too. The yarn has "fuzzed up" a little, but I don't mind.
Because of my cold feet, I layer socks. Between November and March I wear two pairs of socks every day - a thin store-bought pair of black wool socks under a (typically brightly coloured) hand-knit pair. The inner socks are a fine ribbed sock, very much like a men's dress sock, that I found at Simon's in Montreal some years ago. They're absolutely brilliant, and over a few business trips I bought myself 12 pairs. After 8 or 10 years, a couple have gone missing, and the rest are starting to wear out. I put a call into a friend in Montreal, but he wasn't able to find them for me.
(And yes, this means that I buy my winter shoes in a size larger than my summer shoes.)
I was starting to worry about what my sock layering strategy would be... but then I finished this pair. It hadn't occurred to me that I could knit the inner-layer socks, because I wasn't sure I could make them fine enough to fit under another pair. But this yarn is my answer!
The Berroco Ultra Alpaca Fine is indeed quite fine - finer than most other sock yarns I've worked with. I knitted these socks snug (knowing that they'd be very stretchy because of the alpaca content), and they have turned out to be the ideal inner layering sock.
 So now I have cooked up a plan.
I'm going to buy up a whole ton of this yarn and knit myself a whole new set of layering socks. Once I've finished up the two brightly coloured pairs currently on my needles, it's nothing but plain black socks for a while. By the time next winter rolls around, I should be ready.
Thursday, February 10, 2011
Found! The Mary Maxim Pattern Book

I've blogged here a couple of times about vintage Mary Maxim sweater patterns. I've been lucky enough to receive copies of original Mary Maxim patterns in collections of old patterns I've been given.
Mary Maxim sweaters are also known as curling sweaters. They are designs based on, inspired by the traditional "Cowichan" sweaters of the Pacific Northwest, big bulky knitted jackets with motifs on the back. Classic motifs include wildlife, hockey players, tractors, that sort of thing. They were hugely popular as both knitting projects and fashion items in the 1950s and 1960s.
There must be a magic combination of Google words that brings people to my site, because at least once a month I get an email asking where to find patterns, or if I'd be willing to sell one of the ones I have.
Not willing to sell one, sorry - but I have a better solution.
Mary Maxim, has recently published a pattern book with a selection of their designs, including the very first one.
If you're looking for a "curling sweater" pattern, this is the book you need.
You can order it here.
Monday, February 07, 2011
What a Great Weekend: New Knitting Friends
I had a terrific time at the DKC Winter Workshops this past weekend. I met some great new knitters and friends - and caught up with some old friends, too.
There's Debbie, who apparently used to crochet in a past life. I teach a class called Crochet For Knitters. It's about teaching knitters how a crochet hook can make their lives better - for picking up stitches, for quick seams, for decorative edgings, for lie-flat edgings, for lengthening sleeves that were inadvertently knitted too short (yes, I'm looking at you, M.). I don't fuss about style, and we don't worry about reading the patterns, it's sort of the crafter's equivalent of a conversational Italian course - just enough to be able to find your way around, but not so much that you're worrying about correct verb forms. Knitters are often clumsy at first with a crochet hook - god knows I was - but Debbie was some sort of savant. Her friends and I just watched her swoop the hook ever-so-elegantly, like she'd done it before.
I met a real live natural Norwegian Purler - that is, someone who was taught that way and didn't know there was any other way. Her name is Sue, and she learnt to knit in Denmark. I think I startled her when I realized how she was knitting and rushed over to watch. I had to reassure her that what she was doing was actually very cool. She said that she had noticed that no-one else did it the same way in North America. I told her that she should be proud of her method, and should offer to teach it to anyone who remarks upon her knitting. So - look out for a lovely lady called Sue who purls Norwegian style - she may well teach you!
And there's Liz who took my "Lace 102" class so she could tackle a Shetland lace pattern from Heirloom Knitting. Specifically, a multi-pattern, multi-bordered cob-web weight Shetland lace shawl that can be worked as either a triangle or square. The triangle requires 6 x 25gm of 1 ply lace weight. 25gm of this yarn has 350m of yarn. I got out my calculator (since being good at math is not nearly the same thing as being good at arithmetic), and worked it out: that's 2100m of yarn. Cobweight weight yarn. FOR THE HALF SIZE VERSION.
The full size version takes twice that.
Liz has the right attitude - she's set herself a 5 year goal. I plan to take her out for a drink when it's done.
There's Debbie, who apparently used to crochet in a past life. I teach a class called Crochet For Knitters. It's about teaching knitters how a crochet hook can make their lives better - for picking up stitches, for quick seams, for decorative edgings, for lie-flat edgings, for lengthening sleeves that were inadvertently knitted too short (yes, I'm looking at you, M.). I don't fuss about style, and we don't worry about reading the patterns, it's sort of the crafter's equivalent of a conversational Italian course - just enough to be able to find your way around, but not so much that you're worrying about correct verb forms. Knitters are often clumsy at first with a crochet hook - god knows I was - but Debbie was some sort of savant. Her friends and I just watched her swoop the hook ever-so-elegantly, like she'd done it before.
I met a real live natural Norwegian Purler - that is, someone who was taught that way and didn't know there was any other way. Her name is Sue, and she learnt to knit in Denmark. I think I startled her when I realized how she was knitting and rushed over to watch. I had to reassure her that what she was doing was actually very cool. She said that she had noticed that no-one else did it the same way in North America. I told her that she should be proud of her method, and should offer to teach it to anyone who remarks upon her knitting. So - look out for a lovely lady called Sue who purls Norwegian style - she may well teach you!
And there's Liz who took my "Lace 102" class so she could tackle a Shetland lace pattern from Heirloom Knitting. Specifically, a multi-pattern, multi-bordered cob-web weight Shetland lace shawl that can be worked as either a triangle or square. The triangle requires 6 x 25gm of 1 ply lace weight. 25gm of this yarn has 350m of yarn. I got out my calculator (since being good at math is not nearly the same thing as being good at arithmetic), and worked it out: that's 2100m of yarn. Cobweight weight yarn. FOR THE HALF SIZE VERSION.
The full size version takes twice that.
Liz has the right attitude - she's set herself a 5 year goal. I plan to take her out for a drink when it's done.
Thursday, January 27, 2011
A Scarf for Spring: Sekku Herringbone
 I have a mild obsession with the Noro yarns -I love the way they combine colour. A successful Noro design keeps the stitchwork simple and lets the colours show off. This classic and simple lace pattern causes the rows to scallop, making lovely wavy stripes.
This scarf uses one ball of Noro's Sekku laceweight, a rather lovely blend of wool, cotton and silk. It's got a cool cotton-y hand, but the wool and silk make it warm and ensure it handles a lace pattern stitch well.
This is a terrific project to try out lace - only one pattern row, with a straightforward 12-stitch repeat. And I've written the pattern with lots of extra detail to help out newer knitters.
Don't be afraid of the fineness of the yarn and needles - this is really no more work than a pair of socks, and much easier to show off.
It would also work very well with one skein of the new Kirimeiki laceweight or any of the Noro sock yarns - Kureyon, Silk Garden or Taiyo. For those yarns, use a 3mm needle for the knitting and a 4mm needle for casting off.
The finished Sekku scarf is approximately 28 cm/11 inches wide x 127 cm/50 inches long after blocking. A thicker yarn would provide a bigger scarf, of course.
Buy the pattern now on Patternfish and Ravelry.
Thanks to Natalie for the excellent photography!


Monday, January 24, 2011
More Upcoming Classes: Fair Isle Workshop for KW Guild
 I'm on the road again in February, off to Kitchener to teach at the Kitchener Waterloo Guild's February workshop.
I'm teaching a full day class, February 26th, "The Fair Isle Bootcamp".
This class will teach you everything you need to know to be a confident Fair Isle knitter. Through practice swatches, you’ll master reading the patterns and charts, and working with multiple colours - both one-handed and two-handed methods, both in-the-round and flat. In the second half of the class, you’ll be provided with the motifs and pattern to create your own pair of custom fingerless mitts. Upon registration, students will be provided with a materials list for swatching; a materials kit to make the fingerless mitts will be supplied at the class and is included in the cost of registration.
To give a taste of what we'll be working on, my Fair Isle sampler mitten is in the photo at left.
Registration is only open to Guild members until February 1st, but you can enquire about availability and get on the list by emailing KWKGworkshops at gmail dot com, attention Lynne Sosnowski.
More info here and in the newsletter here.
The event is being held at the Laurentian Centre Zehr’s store, 750 Ottawa Street South (Ottawa at Alpine), Kitchener, 9:30am to 3:30pm and the cost to register is $75 for members/$90 for non-members.
Upcoming Classes: DKC Winter Workshop
I'm again honoured to be teaching at the DKC Winter Workshops, being held February 5th and 6th at Metro Hall in Toronto.
I'm teaching the following classes:
Cables 101 - suitable for newer knitters who are looking to tackle cables. I cover both written and charted instructions.
Cabling without a Cable Needle - speed up your cable knitting and expand your skills. Suitable for knitters who have a little experience with cable knitting.
Lace 101 - suitable for newer knitters who are looking to tackle lace. I cover both written and charted instructions, and share tips for making lace knitting easier and more fun.
Next Steps in Lace Knitting - for knitters who have worked one or two lace patterns, I provide more insight into addressing mistakes, discuss more complex patterns like two-sided lace, and focus on building your confidence and your skills.
Design Your Own Custom-Fit Socks - Toe up, or top-down, design a sock that fits you precisely! We'll talk about special fits like wider or narrow ankles; odd feet and knee socks.
Crochet for Knitters - Crochet is an excellent skill to have for a knitter - pick up dropped stitches, create decorative and functional edgings, and work very fast seams. Suitable for all levels of knitters who don't know how to crochet.
Full schedule and registration information here.
I'm teaching the following classes:
Cables 101 - suitable for newer knitters who are looking to tackle cables. I cover both written and charted instructions.
Cabling without a Cable Needle - speed up your cable knitting and expand your skills. Suitable for knitters who have a little experience with cable knitting.
Lace 101 - suitable for newer knitters who are looking to tackle lace. I cover both written and charted instructions, and share tips for making lace knitting easier and more fun.
Next Steps in Lace Knitting - for knitters who have worked one or two lace patterns, I provide more insight into addressing mistakes, discuss more complex patterns like two-sided lace, and focus on building your confidence and your skills.
Design Your Own Custom-Fit Socks - Toe up, or top-down, design a sock that fits you precisely! We'll talk about special fits like wider or narrow ankles; odd feet and knee socks.
Crochet for Knitters - Crochet is an excellent skill to have for a knitter - pick up dropped stitches, create decorative and functional edgings, and work very fast seams. Suitable for all levels of knitters who don't know how to crochet.
Full schedule and registration information here.
Thursday, January 20, 2011
Expanding My Own Skills; Giving Yourself Permission to Be Awful
The Harlot posted recently about the process of learning, and how we forget that we have to be bad at something before we can get good at it.
I see this all the time in my knitting classes; as adults we expect, I think, that we'll be proficient at everything right from the get-go. I see knitters get frustrated with themselves because they don't get something straight away; I see knitters angry with their work because it doesn't look like the work on my needles, or the samples in the shop.
It's easy to be patient with my students, because I know it's going to get better. I explain, first of all, that everything looks better if you give it a wash (it does! really! next time you knit two of something - socks, mittens, sleeves - wash one and not the other and compare). And I explain that everyone's first efforts were fairly dreadful.
I really wish I'd kept my earliest attempts at knitting, to show off in my classes. They'd be great for comedy value, but also to reassure knitters that they're doing very well!
There was that purple cotton cardigan... oh dear... And those first socks, those red worsted weight socks. And I can remember so very clearly asking the very patient woman at my then-LYS how on earth you were supposed to know what size the hat was going to be when it was done.
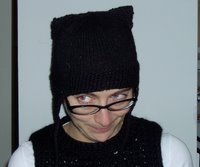 (This hat, BTW. It turned out to be the perfect size.)
I've been expanding my own skills of late, challenging myself to learn techniques outside my comfort level. And as is always the way, we are hardest on ourselves. When ripping out the swatch for the fourth time, cursing loud enough to wake the dog, I realized that maybe I shouldn't be so hard on myself... and that maybe I should take a lesson from myself.
I see this all the time in my knitting classes; as adults we expect, I think, that we'll be proficient at everything right from the get-go. I see knitters get frustrated with themselves because they don't get something straight away; I see knitters angry with their work because it doesn't look like the work on my needles, or the samples in the shop.
It's easy to be patient with my students, because I know it's going to get better. I explain, first of all, that everything looks better if you give it a wash (it does! really! next time you knit two of something - socks, mittens, sleeves - wash one and not the other and compare). And I explain that everyone's first efforts were fairly dreadful.
I really wish I'd kept my earliest attempts at knitting, to show off in my classes. They'd be great for comedy value, but also to reassure knitters that they're doing very well!
There was that purple cotton cardigan... oh dear... And those first socks, those red worsted weight socks. And I can remember so very clearly asking the very patient woman at my then-LYS how on earth you were supposed to know what size the hat was going to be when it was done.
 (This hat, BTW. It turned out to be the perfect size.)
I've been expanding my own skills of late, challenging myself to learn techniques outside my comfort level. And as is always the way, we are hardest on ourselves. When ripping out the swatch for the fourth time, cursing loud enough to wake the dog, I realized that maybe I shouldn't be so hard on myself... and that maybe I should take a lesson from myself.
Sunday, January 09, 2011
Continental Knitting; the Norwegian Purl
I taught a couple of classes on Continental knitting this past weekend in New Hamburg. Now, some may question my qualifications to knit such a classes, since by default I knit English-style - that is, with my yarn in my right hand. I learnt that way, when I was very young, and I find that although it might not be the fastest method, it's very comfortable for me.
But that doesn't mean I don't use and enjoy the Continental method when it suits me. I'm all about having options!
Continental knitting has you hold your yarn in your left hand, like so:

English-style knitters, like me, usually find the Continental knit stitch easy to manage - it's easy to work, and the benefits are immediate and obvious.
Because the working yarn is stretched behind your needles, it's pretty easy to "pick" the stitch. Like so:

Just put the right-hand needle into the stitch, and swing the tip of the needle over top of the working yarn to the right, and bring the working yarn back through the stitch. Easy!
It's much more efficient in movement, since you're not moving the yarn at all, and barely moving the needles.
I like to use the continental knit when I'm working a piece entirely in garter stitch, or when my hands are tired.
My gauge is quite different between the English and Continental methods, however, so I have to be consistent about which method I'm using in a project. This is true for many knitters - continental knitting is often looser than English knitter.
I must confess, however, that although I could (and would) do it, until recently I'd never really been fluid with the Continental purl.
No matter what method they learn, it seems that a lot of newer knitters dislike purling - they find it cumbersome and sort of unnatural. (They're not wrong; there is a theory among knitting historians that knitting in the round was invented first, and then the purl was a later adaptation to make it work flat.) A purl seems fiddly in English knitting, but downright unpleasant in Continental knitting. It's the pesky wrap.
What you save in movement in a Continental knit seems to get spent in the purl, trying to man-handle the yarn over the needle point and make it stay still while you move the needles.
There are a couple of common ways of wrapping the yarn for the Continental purl.
With your index (or middle) finger:

Or with your thumb (less "traditional", but I find this easier - I can pivot my thumb and let my fingers worry about holding the needles):

These work well, but don't feel elegant to me.
And then there's the Norwegian purl. I did some experimenting with it and reading about it before I taught the New Hamburg class, and I think it's changed my life.
In essence, instead of moving the yarn to work the purl, you move the needle. It's much closer to the method you use for the Continental knit stitch, in fact.
It goes like this...
Leave the yarn at the back (Yes, pause to think about that. No moving the yarn at all. Imagine how easy ribbing could be!) and put the needle into the stitch as normal for purling (that is, from back to front)...

And, leaving the yarn in place, move the tip of the right hand needle around the working yarn (as you do for a knit; think on that, too - makes it very easy and familiar)....

Then once the yarn is wrapped around the needle like this:

push the wrapped needle back through the stitch (from front back through to the back), like this:

For some knitters, it's a world-changer. I know it was for me. If you've been struggling with a Continental purl, try it.
Some knitters do still find it easier if you bring the yarn to the front, but still use the same basic technique.
You can read more about it, and see more pictures here and here on the blog of Knitty's Teresa.
Play with it and see how it works for you. Let me know how it goes!
But that doesn't mean I don't use and enjoy the Continental method when it suits me. I'm all about having options!
Continental knitting has you hold your yarn in your left hand, like so:
English-style knitters, like me, usually find the Continental knit stitch easy to manage - it's easy to work, and the benefits are immediate and obvious.
Because the working yarn is stretched behind your needles, it's pretty easy to "pick" the stitch. Like so:

Just put the right-hand needle into the stitch, and swing the tip of the needle over top of the working yarn to the right, and bring the working yarn back through the stitch. Easy!
It's much more efficient in movement, since you're not moving the yarn at all, and barely moving the needles.
I like to use the continental knit when I'm working a piece entirely in garter stitch, or when my hands are tired.
My gauge is quite different between the English and Continental methods, however, so I have to be consistent about which method I'm using in a project. This is true for many knitters - continental knitting is often looser than English knitter.
I must confess, however, that although I could (and would) do it, until recently I'd never really been fluid with the Continental purl.
No matter what method they learn, it seems that a lot of newer knitters dislike purling - they find it cumbersome and sort of unnatural. (They're not wrong; there is a theory among knitting historians that knitting in the round was invented first, and then the purl was a later adaptation to make it work flat.) A purl seems fiddly in English knitting, but downright unpleasant in Continental knitting. It's the pesky wrap.
What you save in movement in a Continental knit seems to get spent in the purl, trying to man-handle the yarn over the needle point and make it stay still while you move the needles.
There are a couple of common ways of wrapping the yarn for the Continental purl.
With your index (or middle) finger:

Or with your thumb (less "traditional", but I find this easier - I can pivot my thumb and let my fingers worry about holding the needles):

These work well, but don't feel elegant to me.
And then there's the Norwegian purl. I did some experimenting with it and reading about it before I taught the New Hamburg class, and I think it's changed my life.
In essence, instead of moving the yarn to work the purl, you move the needle. It's much closer to the method you use for the Continental knit stitch, in fact.
It goes like this...
Leave the yarn at the back (Yes, pause to think about that. No moving the yarn at all. Imagine how easy ribbing could be!) and put the needle into the stitch as normal for purling (that is, from back to front)...

And, leaving the yarn in place, move the tip of the right hand needle around the working yarn (as you do for a knit; think on that, too - makes it very easy and familiar)....

Then once the yarn is wrapped around the needle like this:

push the wrapped needle back through the stitch (from front back through to the back), like this:

For some knitters, it's a world-changer. I know it was for me. If you've been struggling with a Continental purl, try it.
Some knitters do still find it easier if you bring the yarn to the front, but still use the same basic technique.
You can read more about it, and see more pictures here and here on the blog of Knitty's Teresa.
Play with it and see how it works for you. Let me know how it goes!
Tuesday, January 04, 2011
A Return to Shall We Knit: Two Socks, and Continental Knitting
I'm off to Shall We Knit again this coming weekend, Jan 8 & 9, for two new classes. (It looks like the weather will be ok, but we have scheduled a snow date, just in cast Mother Nature decides to have some fun with us.)
Two Socks at the Same Time. The Normal Way, on Magic Loop. Like this:

And Continental Knitting. Speed up your knitting by learning a new technique!
Details here.
Two Socks at the Same Time. The Normal Way, on Magic Loop. Like this:

And Continental Knitting. Speed up your knitting by learning a new technique!
Details here.
Saturday, January 01, 2011
Looking forward to 2011
Here and at the KnittyBlog, I've written some thoughts about 2010.
(You do read the KnittyBlog, don't you? You should. I write there at least once a week.)
But what of 2011? Things I'm looking forward to in this new year...
(You do read the KnittyBlog, don't you? You should. I write there at least once a week.)
But what of 2011? Things I'm looking forward to in this new year...
- my name in a number of publications (and on the front cover of one of them, I hope)
- experimenting with more colourwork
- teaching further afield (Starting with Shall We Knit again next week! Yay! Two-socks at once on magic loop, and continental knitting, if you're wondering.)
- spinning
- knitting with wire
- more crochet; I started a crochet shawl about 6 months ago, and I really would like to finish the damn thing
- teaching the dog to stop playing with my yarn.
Thursday, December 23, 2010
2010: Thank You!
2010 is coming rapidly to a close. What a year!
This is the year I went pro. I finally gave up the day job, and have been working full-time as a knitting professional. It's been challenging and busy, but I'm so very glad I did it.
I can't believe all the things I've done this year:
I've taught classes at
-Lettuce Knit
-The Purple Purl
-PassionKnit
-the dearly departed Naked Sheep
-two DKC events
-the Creativ Festival
-Shall We Knit in New Hamburg
And I've had speaking engagements at
-the Kawartha Lakes Knitting Guild
-the Kitchener Waterloo Knitting Guild
I've written for
-this blog
-the Knittyblog
-the Signature Needles blog
I've had designs published in
-Knitty
-Yarn Forward Mag
I've appeared in several books, including
The Perfect Finish
Behind the scenes, I've done:
-technical editing & production support for 4 issues of Knitty
-editing for 4 issues of A Needle Pulling Thread Magazine
-various other tech editing work for yarn companies and publishers
I've published a bunch of new designs, including
-the Heirloom Baby Bonnet
-the Roasted Carrot Sock
-the Walking on Sunshine socks
And I've loved every single minute of it.
Thanks a million to everyone I've worked with and for, and everyone who has bought my patterns, and everyone I've met this year. Your support means so much to me.
I can't tell you how much I'm looking forward to 2011. 2011 brings new challenges and ideas and publications - not least of which is my very own book. More details on that as we get closer, but we're hoping for spring/summer publication.
This is the year I went pro. I finally gave up the day job, and have been working full-time as a knitting professional. It's been challenging and busy, but I'm so very glad I did it.
I can't believe all the things I've done this year:
I've taught classes at
-Lettuce Knit
-The Purple Purl
-PassionKnit
-the dearly departed Naked Sheep
-two DKC events
-the Creativ Festival
-Shall We Knit in New Hamburg
And I've had speaking engagements at
-the Kawartha Lakes Knitting Guild
-the Kitchener Waterloo Knitting Guild
I've written for
-this blog
-the Knittyblog
-the Signature Needles blog
I've had designs published in
-Knitty
-Yarn Forward Mag
I've appeared in several books, including
The Perfect Finish
Behind the scenes, I've done:
-technical editing & production support for 4 issues of Knitty
-editing for 4 issues of A Needle Pulling Thread Magazine
-various other tech editing work for yarn companies and publishers
I've published a bunch of new designs, including
-the Heirloom Baby Bonnet
-the Roasted Carrot Sock
-the Walking on Sunshine socks
And I've loved every single minute of it.
Thanks a million to everyone I've worked with and for, and everyone who has bought my patterns, and everyone I've met this year. Your support means so much to me.
I can't tell you how much I'm looking forward to 2011. 2011 brings new challenges and ideas and publications - not least of which is my very own book. More details on that as we get closer, but we're hoping for spring/summer publication.
Tuesday, December 14, 2010
Crowdsourcing: Thank you!
Big thanks to my readers and Twitter followers for some help they've provided me recently: I have lots of babies' head measurements, and some great feedback on the catnip-stuffed mouse pattern.
I have learned several things: my readers are helpful and generous, babies' head vary greatly in size, and some cats are pretty vicious!
I have learned several things: my readers are helpful and generous, babies' head vary greatly in size, and some cats are pretty vicious!
Friday, December 10, 2010
May I Please Measure Your Baby's Head?
A few months ago I worked on the pattern for the Heirloom Baby Bonnet. It's been a winner - people love knitting it, and I love seeing the adorable results.

I've been asked about writing it for multiple sizes. The original pattern was sized to match the original bonnet. (See story here.) It fits about a 3 month old.
It's not as easily resized as a standard hat, because of the way it fits. I've found useful tables of head circumferences only - the Craft Yarn Council of America site has a great page here.

(The graphic comes from their site.)
But head circumference isn't immediately helpful for this design. I need the other direction - around under the chin and up over the top of the head, and then the partial circumference around the back of the head at about cheek height.
I've been grumbling that I don't have access to a baby to measure, and I'm pretty sure I'd be arrested if I started trying to measure the heads of babies in the street.
And then it occurs to me - out there in internet land, there are babies! And mamas of said babies who might be willing to help me.
Mamas? Can you help?
I'm looking for the following info, for babies up to 18 months old: age of the babe, circumference of the head around the chin and up over the top of the head, and measurement around the back of the head from cheek to cheek.
Please leave a comment or email me the info. Free copy of the multi-size baby bonnet pattern to anyone who can help.
Thank you!
I've been asked about writing it for multiple sizes. The original pattern was sized to match the original bonnet. (See story here.) It fits about a 3 month old.
It's not as easily resized as a standard hat, because of the way it fits. I've found useful tables of head circumferences only - the Craft Yarn Council of America site has a great page here.
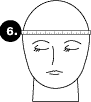
(The graphic comes from their site.)
But head circumference isn't immediately helpful for this design. I need the other direction - around under the chin and up over the top of the head, and then the partial circumference around the back of the head at about cheek height.
I've been grumbling that I don't have access to a baby to measure, and I'm pretty sure I'd be arrested if I started trying to measure the heads of babies in the street.
And then it occurs to me - out there in internet land, there are babies! And mamas of said babies who might be willing to help me.
Mamas? Can you help?
I'm looking for the following info, for babies up to 18 months old: age of the babe, circumference of the head around the chin and up over the top of the head, and measurement around the back of the head from cheek to cheek.
Please leave a comment or email me the info. Free copy of the multi-size baby bonnet pattern to anyone who can help.
Thank you!
Thursday, December 09, 2010
Happy Birthday Lettuce Knit - Still Reasonably Local

I moved into the Kensington Market neighbourhood of Toronto 7 and a half years ago. At the time, I remarked to my hubby that it seemed perfect - everything we needed was in walking distance - except a yarn shop.
This said was purely in jest, as there was a very good yarn shop 1.6km (1 mile) away, a very nice 15 minute walk through a park.
And lo and behold, 6 months later, Lettuce Knit opened. On the very street on which I live! Just over 200m (about 230 yds) away. I was in heaven.
Over the 7 years the shop has been open, it's moved twice, each time to larger premises. Sadly, it's been moving further away.... now it's at number 86 Nassau Street, a whole 70m (75yds) further down the street.
Despite this extra distance, I may well be the luckiest knitter in the world - I don't know many who live quite that local to their local yarn shop. It's less than a skein's distance away!
And I'm even luckier to be part of the Lettuce family: I've been teaching and working there for 4 of its 7 years. Happy Birthday to my most local yarn shop, and the great team that works there!
Anyone live closer to a yarn shop? (Megan, who lives about 50m away, doesn't count, she's the owner!)
Thursday, December 02, 2010
Being Rude Again/A Victim of Geography
I had a Twitter conversation with a friend this morning, and N. pointed out it me that it looked from the outside like I was being rude about a designer. Specifically, I said that I thought the designs of Debbie Bliss are "gorgeous... her write-ups not so much".
I do have a bit of a big mouth - my opinions can be strong, and I sometimes type before I think. I don't take back my statement, but let me add some context.
I love love love the designs of Debbie Bliss. She has a genuine gift for simplicity and elegance. She understands that less is more in a way that few other designers do. I've knitted a number of her designs over the years, and I buy her magazine and her books.
But I have been known to grumble about her pattern writeups - and today I did. Her instructions are known to be fairly... shall we say... minimal. It's not about mistakes or problems, not at all. As a knitter and a teacher I've never encountered any actual mistakes or problems with any of them. The issue is always about the level of detail in the instructions.
I don't actually blame any of this on Debbie Bliss or her technical editors. I blame geography. And it's not just Debbie Bliss - the Rowan pattern books are similar in the way they are written.
I've recently been doing some technical editing for a yarn company, helping them convert some patterns published in Europe to a more North American standard.
The standards for pattern writing are wildly different between Europe and North America. And the UK patterns fall somewhere in between.
It's about space. European pattern books typically print their patterns in multiple language, and therefore where they can edit to be more concise, they do. And that conciseness results in patterns that require a little more knowledge and experience to successfully follow them, that's all.
Consider the following example, taken directly from a pattern published in Europe.
Back:
Cast on 117(129) sts, then work over the 39(45) sts at each outer edge as foll: edge st and st st, in pattern mix foll chart A over the 39 center sts, dec 4 sts evenly across as given = 113(125)sts. When work measures 32 cm, on 103rd row patt mix, bind off for armholes at each end 3(5) sts once, then on every 2nd row 2 sts once and 1st 3 times = 97(105) sts.
It's perfectly correct, and it's perfectly knittable, but there's a lot of information packed into those few words. And it's not just about denseness, it also requires a fair bit of experience. For example, it tells you to bind off sts for armholes "at each end... every 2nd row". Taken at face value, that instruction could be tricky... after all, it's not possible to bind off at the start and end of a row (without doing some "stitch gymnastics", anyway).
Re-written to a style more familiar to North American knitters, the instruction becomes:
Using 3.5mm (US 4) needles, cast on 117 (129) sts.
Row 1 (RS): K 39 (45), work Chart A row 1 across center 39 sts (including decreases as charted), k to end. 113 (125) sts.
Row 2 (WS): P 39 (45), work Chart A row 2 across center 35 sts, p to end.
Continue in pattern as established until pattern row 102 is complete.
Bind off 3(5) sts at the start next 2 rows, continuing to work Chart on center 35 sts as established. 107 (115) sts.
Bind off 2(2) at the start of the next 2 rows. 103 (111) sts.
Decrease 1 st at each end of the following 3 RS rows. 97(105) sts.
Compare a typical Debbie Bliss or Rowan pattern to this European example - it's positively voluble!
Patterns published in the UK don't necessarily have the same space constraints as other European patterns, as they are only publishing in one language, and therefore they do provide a fair bit more detail. It's just that it's not necessarily the level of detail that you see in typical modern North American patterns.
Really, the biggest issue with this is that because Ms. Bliss's gorgeous designs appeal to newer knitters in their simplicity, but the pattern instructions can challenging.
There's a longer discussion here about how much knowledge is appropriate to assume on the part of the knitter... I know that there have been, and there will always be, discussions about whether simplifying and adding more detail is "dumbing down".
Despite my somewhat cranky demeanor, I'm all about encouragement. I want knitters to feel confident and be successful with their projects - and if that means taking a few extra lines to explain something in more detail, then I'm all for it! After all, we knit for pleasure - we shouldn't make it any more difficult than it needs to be.
I do have a bit of a big mouth - my opinions can be strong, and I sometimes type before I think. I don't take back my statement, but let me add some context.
I love love love the designs of Debbie Bliss. She has a genuine gift for simplicity and elegance. She understands that less is more in a way that few other designers do. I've knitted a number of her designs over the years, and I buy her magazine and her books.
But I have been known to grumble about her pattern writeups - and today I did. Her instructions are known to be fairly... shall we say... minimal. It's not about mistakes or problems, not at all. As a knitter and a teacher I've never encountered any actual mistakes or problems with any of them. The issue is always about the level of detail in the instructions.
I don't actually blame any of this on Debbie Bliss or her technical editors. I blame geography. And it's not just Debbie Bliss - the Rowan pattern books are similar in the way they are written.
I've recently been doing some technical editing for a yarn company, helping them convert some patterns published in Europe to a more North American standard.
The standards for pattern writing are wildly different between Europe and North America. And the UK patterns fall somewhere in between.
It's about space. European pattern books typically print their patterns in multiple language, and therefore where they can edit to be more concise, they do. And that conciseness results in patterns that require a little more knowledge and experience to successfully follow them, that's all.
Consider the following example, taken directly from a pattern published in Europe.
Back:
Cast on 117(129) sts, then work over the 39(45) sts at each outer edge as foll: edge st and st st, in pattern mix foll chart A over the 39 center sts, dec 4 sts evenly across as given = 113(125)sts. When work measures 32 cm, on 103rd row patt mix, bind off for armholes at each end 3(5) sts once, then on every 2nd row 2 sts once and 1st 3 times = 97(105) sts.
It's perfectly correct, and it's perfectly knittable, but there's a lot of information packed into those few words. And it's not just about denseness, it also requires a fair bit of experience. For example, it tells you to bind off sts for armholes "at each end... every 2nd row". Taken at face value, that instruction could be tricky... after all, it's not possible to bind off at the start and end of a row (without doing some "stitch gymnastics", anyway).
Re-written to a style more familiar to North American knitters, the instruction becomes:
Using 3.5mm (US 4) needles, cast on 117 (129) sts.
Row 1 (RS): K 39 (45), work Chart A row 1 across center 39 sts (including decreases as charted), k to end. 113 (125) sts.
Row 2 (WS): P 39 (45), work Chart A row 2 across center 35 sts, p to end.
Continue in pattern as established until pattern row 102 is complete.
Bind off 3(5) sts at the start next 2 rows, continuing to work Chart on center 35 sts as established. 107 (115) sts.
Bind off 2(2) at the start of the next 2 rows. 103 (111) sts.
Decrease 1 st at each end of the following 3 RS rows. 97(105) sts.
Compare a typical Debbie Bliss or Rowan pattern to this European example - it's positively voluble!
Patterns published in the UK don't necessarily have the same space constraints as other European patterns, as they are only publishing in one language, and therefore they do provide a fair bit more detail. It's just that it's not necessarily the level of detail that you see in typical modern North American patterns.
Really, the biggest issue with this is that because Ms. Bliss's gorgeous designs appeal to newer knitters in their simplicity, but the pattern instructions can challenging.
There's a longer discussion here about how much knowledge is appropriate to assume on the part of the knitter... I know that there have been, and there will always be, discussions about whether simplifying and adding more detail is "dumbing down".
Despite my somewhat cranky demeanor, I'm all about encouragement. I want knitters to feel confident and be successful with their projects - and if that means taking a few extra lines to explain something in more detail, then I'm all for it! After all, we knit for pleasure - we shouldn't make it any more difficult than it needs to be.
Wednesday, December 01, 2010
And so the Holiday Season Begins...
Happy December!
It's a time for celebrations and feasting and decorating and giving of goodies. No matter what you celebrate, I hope the closing of the year finds you well and happy and surrounded by what gives you joy.
Me, I'm surrounded by knitting, delicious treats and a warm, sleepy dog. We're a bi-festive family, celebrating both Christmas and Hanukkah.
For the past couple of years, I've designed a couple of holiday treats for my lovely friends at Signature Needle Arts, one of each of the holidays I celebrate.
This year there's the Argyle Stocking.

And the Hanukkah Mitten and Sock Garland - for decorating, and filling with gelt.


Visit the Signature Needle Arts Website to get the patterns.
It's a time for celebrations and feasting and decorating and giving of goodies. No matter what you celebrate, I hope the closing of the year finds you well and happy and surrounded by what gives you joy.
Me, I'm surrounded by knitting, delicious treats and a warm, sleepy dog. We're a bi-festive family, celebrating both Christmas and Hanukkah.
For the past couple of years, I've designed a couple of holiday treats for my lovely friends at Signature Needle Arts, one of each of the holidays I celebrate.
This year there's the Argyle Stocking.

And the Hanukkah Mitten and Sock Garland - for decorating, and filling with gelt.


Visit the Signature Needle Arts Website to get the patterns.
Monday, November 29, 2010
More On the Majesty of Mattress Stitch
(Ok, so the alliteration ran out there...)
Loving the comments on my Knittyblog post about Mattress stitch. Some very helpful suggestions!
Loving the comments on my Knittyblog post about Mattress stitch. Some very helpful suggestions!
Thursday, November 25, 2010
The Precious: Snowflower Shawl
For several weeks this summer I was working on a secret project... That's the (only) problem with knitting designs for publications - I can't blog about them.
This was a big project. By yardage, it's one of the biggest things I've knit, calling for about 1500m of lace weight cashmere. And being 1500m of lace weight cashmere, it's also one of the most precious things I've knitted.
It's finally been published, and I'm thrilled to be able to show it off...
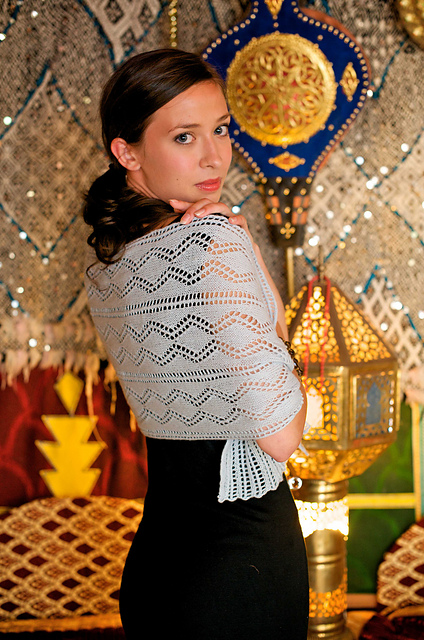
The Snowflower Shawl, for Yarn Forward Magazine Issue 31.
 (All images courtesy Yarn Forward Magazine, copyright St Range photography/Darren Strange.)
It's the last part in a three-part series on how to expand your lace knitting skills.
The first was the Double Diamond stole, in issue 29.
 The second part was the Falling Leaves triangle shawl, in issue 30.

And the finale is this circular shawl, based on Elizabeth Zimmerman's Pi shawl shaping.
One of the reasons I love designing for Yarn Forward - other than the fact they send me such gorgeous yarns to work with - is that the publications are available digitally. The publication is based in the UK, but anyone can buy a copy, and the issues remain for sale long after the print copies have sold out.
This was a big project. By yardage, it's one of the biggest things I've knit, calling for about 1500m of lace weight cashmere. And being 1500m of lace weight cashmere, it's also one of the most precious things I've knitted.
It's finally been published, and I'm thrilled to be able to show it off...
The Snowflower Shawl, for Yarn Forward Magazine Issue 31.
 (All images courtesy Yarn Forward Magazine, copyright St Range photography/Darren Strange.)
It's the last part in a three-part series on how to expand your lace knitting skills.
The first was the Double Diamond stole, in issue 29.
 The second part was the Falling Leaves triangle shawl, in issue 30.
And the finale is this circular shawl, based on Elizabeth Zimmerman's Pi shawl shaping.
One of the reasons I love designing for Yarn Forward - other than the fact they send me such gorgeous yarns to work with - is that the publications are available digitally. The publication is based in the UK, but anyone can buy a copy, and the issues remain for sale long after the print copies have sold out.
Tuesday, November 23, 2010
Harumph, I say; harumph!
Minor guilty confession of the week: I read the Dear Prudence advice column on Slate.
Or at least I used to.
In a live chat column she wrote this week, a reader enquires:
It's the answer that made my hair stand on end:
On behalf of all the sock knitters in the world, I am truly offended that Ms. Prudence thinks that the socks we make are "lumpy, itchy and droopy". Perhaps we should launch a campaign to send her some socks so she can see the quality of what we make - and understand how very very wrong she is.
What do you think?
Or at least I used to.
In a live chat column she wrote this week, a reader enquires:
- Q. Help! Advice on Gift-Giving: I am a knitter who is knitting socks for my son's preschool class. I intend to give these socks as Christmas gifts this year. I am keeping them a secret as I would like them to be surprises. The only one who knows is the teacher as I needed her help getting the kids' feet sizes. My question revolves around the note I am going to include with the socks. Of course it will include washing and drying instructions (cold water and low heat); however, I am stumped about how to ask for the socks back if the kids don't like them, so they can be redistributed. Now, I don't really want the socks back for my own son; I would like the socks to go to someone who'd actually wear them. What would you do in this instance?
It's the answer that made my hair stand on end:
- A: In this instance, I would stop with the socks and knit a sweater for my own child. While many people enjoy handmade scarves, there's a reason people stopped wearing lumpy, itchy, droopy handmade socks as soon as industrial looms were invented. It's sweet of you to want to make gifts for the entire class, but you're investing way too much time in a gift that won't be appreciated. If you want to do something handmade, maybe you should bake some treats. Or you could offer to come in and do a knitting lesson for the kids. Unless you're making socks they can hang by the fireplace for Christmas, no one wants handmade socks in their Christmas stocking.
On behalf of all the sock knitters in the world, I am truly offended that Ms. Prudence thinks that the socks we make are "lumpy, itchy and droopy". Perhaps we should launch a campaign to send her some socks so she can see the quality of what we make - and understand how very very wrong she is.
What do you think?
Monday, November 22, 2010
Someone Else's FO: Kureyon Basic Triangle Shawl

Another lovely example of my Basic Triangle Shawl, in Noro Kureyon. Gorgeous - and thanks to Kathleen for the picture. I do so love this yarn - look at those stripes!
Wednesday, November 17, 2010
Heel: For Feet Worthy of Hand-Knit Socks
Earlier this fall, I handed a giant bag of my hand-knit socks over to a friend... my sock drawer sat practically empty for a couple of weeks, as the temperature dropped. It was a bit scary, I have to admit. I had to resort to wearing store-bought socks for a while.
And why on earth would I do something so silly?
My socks went off to modelling school to become famous.

The lovely people at Soak have just launched a new product - Heel - a wonderful foot cream - "for feet worthy of hand-knit socks". (I've been using it for a few weeks, and it's great.)
They needed some socks for the packaging art, and I'm honoured to say that they chose mine!
There's a great post on the Soak blog about the photo shoot, and some really gorgeous shots.

And why on earth would I do something so silly?
My socks went off to modelling school to become famous.

The lovely people at Soak have just launched a new product - Heel - a wonderful foot cream - "for feet worthy of hand-knit socks". (I've been using it for a few weeks, and it's great.)
They needed some socks for the packaging art, and I'm honoured to say that they chose mine!
There's a great post on the Soak blog about the photo shoot, and some really gorgeous shots.

Tuesday, November 16, 2010
Off Topic: Christmas Cake
Updates: No nuts, no! The original recipe doesn't call for them, and although I love them, hubby has some allergies. Re: loaf pans & sizes. I've used a variety of pans and it works great. 8 by 8 square plans, big loaf pans, small loaf pans.... I don't worry about the size of pan, I just start checking for doneness at the 2 hour mark.
I've been tweeting about this often enough and had enough questions that I figured I should just blog about it...
Like many Canadians, I'm an immigrant in a culturally mixed marriage, and Norman and I try to honour the holidays and traditions of both our cultures. One cultural tradition I've brought to the relationship is fruitcake. I absolutely adore fruitcake. I know it's not to everyone's taste, but I also insist that many haven't tasted it the way it's supposed to be made.
And in my opinion, that's boozy. (Apologies to the non-drinkers in the crowd. I know and respect that there are some who don't drink or use alcohol. You can actually get a very similar effect by using a mixture of strong coffee and fruit juice for soaking the fruit, and then soaking the cakes in fruit cordials and syrups.)
My Mum makes the "proper" cake every year, the one we eat during the actual festive meals. I make what I've come to refer to as the "standby" cake. The one we can eat in the run up to Christmas, the one we can offer to guests, the one I can cut up and take to parties and get-togethers during the season. Although Mum's is more traditional, the way I love it, I've found that many fruitcake skeptics enjoy my slightly unorthodox (pun intended?) version. My cake is very dark, sticky and fudgy in texture - and fairly moist with dark rum.
As I tweeted, the recipe I use is, oddly, Canadian. When we first arrived in Canada, my Mum bought of a copy of the now-out-of-print Madame Jehane Benoit's Encyclopedia of Canadian Cooking.
Shortly after I finished university, I decided I wanted to try making fruitcake, but being an inexperienced baker with a minimal kitchen and budget, I wasn't sure I was up for trying the full thing. Mum found me a recipe in Madame Benoit's book - called, amusingly enough, My Mother's Fruitcake.
I've been making it for years now, and I think it's pretty good.
The book seems to be long out of print, and so, with full credit, here's the recipe:
“My Mother’s Fruit Cake” from Madame Jehane Benoit’s Encyclopedia of Canadian Cooking
2 cup currants
2 cups seedless raisins
1 cup mixed peel
1/4 cup rum or orange juice
2 cups butter
2 cups fine granulated sugar
6 eggs, well beaten
2 cups molasses
7 cups all purpose flour
1 tsp baking powder
1 tsp ground nutmeg
1 tablespoon cinnamon
1 tablespoon ground cloves
Put fruit and juice/rum in a bowl and soak for 12 hours, covered, stirring a a few times.
Preheat oven to 240 deg F. (Yes, very low.) Line cake tins with greaseproof paper.
Cream butter with sugar until very light. Add eggs one by one, stirring hard each time. Add molasses.
Sift together dry ingredients.
Add half of flour to creamed butter, mix well.
Add rest of flour alternately with fruit.
Stir until thoroughly blended.
Bake for 3 hours or until cake tester comes out clean.
My notes:
1. I play fast and loose with the fruit. I usually cut back on the raisins and currants and make up the amount with dried cranberries (or glace cherries, but the cranberries are better). I put some finely chopped candied ginger in one year, that was nice. If you don 't like the mixed peel, ditch that and use more cranberries and even dried cherries and blueberries.
2. 1/4 cup juice or rum for 12 hours.... I use about 1/2 to 3/4 cup of booze – whatever is in the bar: rum, gold tequila, rye, bourbon, Southern Comfort, cheap scotch, brandy – and soak for about a week.
3. I use strong dark molasses – the blackstrap variety – because I love the dark and slightly bitter taste it brings. If you’re less about molasses, use the lighter kind.
4. I bake it at least three or four weeks early then store it in the fridge in containers and pour dark rum on it every few days. It will seem fairly soggy, that's ok. Stop watering it about a week before you want to start serving it so the top dries out a bit. This is really the key to making it more interesting and fun than "normal" fruitcake.
5. The batter gets very hard to stir once you’re adding the flour & fruit in. Use serious wooden spoons. I usually lose at least one spatula or wooden spoon to it every year.
6. I bake in loaf pans and it takes 2 to 2 and a bit hours. It’s hard to tell if it’s done – I do the tap the underside trick, like loaves of bread.
I've been tweeting about this often enough and had enough questions that I figured I should just blog about it...
Like many Canadians, I'm an immigrant in a culturally mixed marriage, and Norman and I try to honour the holidays and traditions of both our cultures. One cultural tradition I've brought to the relationship is fruitcake. I absolutely adore fruitcake. I know it's not to everyone's taste, but I also insist that many haven't tasted it the way it's supposed to be made.
And in my opinion, that's boozy. (Apologies to the non-drinkers in the crowd. I know and respect that there are some who don't drink or use alcohol. You can actually get a very similar effect by using a mixture of strong coffee and fruit juice for soaking the fruit, and then soaking the cakes in fruit cordials and syrups.)
My Mum makes the "proper" cake every year, the one we eat during the actual festive meals. I make what I've come to refer to as the "standby" cake. The one we can eat in the run up to Christmas, the one we can offer to guests, the one I can cut up and take to parties and get-togethers during the season. Although Mum's is more traditional, the way I love it, I've found that many fruitcake skeptics enjoy my slightly unorthodox (pun intended?) version. My cake is very dark, sticky and fudgy in texture - and fairly moist with dark rum.
As I tweeted, the recipe I use is, oddly, Canadian. When we first arrived in Canada, my Mum bought of a copy of the now-out-of-print Madame Jehane Benoit's Encyclopedia of Canadian Cooking.
Shortly after I finished university, I decided I wanted to try making fruitcake, but being an inexperienced baker with a minimal kitchen and budget, I wasn't sure I was up for trying the full thing. Mum found me a recipe in Madame Benoit's book - called, amusingly enough, My Mother's Fruitcake.
I've been making it for years now, and I think it's pretty good.
The book seems to be long out of print, and so, with full credit, here's the recipe:
“My Mother’s Fruit Cake” from Madame Jehane Benoit’s Encyclopedia of Canadian Cooking
2 cup currants
2 cups seedless raisins
1 cup mixed peel
1/4 cup rum or orange juice
2 cups butter
2 cups fine granulated sugar
6 eggs, well beaten
2 cups molasses
7 cups all purpose flour
1 tsp baking powder
1 tsp ground nutmeg
1 tablespoon cinnamon
1 tablespoon ground cloves
Put fruit and juice/rum in a bowl and soak for 12 hours, covered, stirring a a few times.
Preheat oven to 240 deg F. (Yes, very low.) Line cake tins with greaseproof paper.
Cream butter with sugar until very light. Add eggs one by one, stirring hard each time. Add molasses.
Sift together dry ingredients.
Add half of flour to creamed butter, mix well.
Add rest of flour alternately with fruit.
Stir until thoroughly blended.
Bake for 3 hours or until cake tester comes out clean.
My notes:
1. I play fast and loose with the fruit. I usually cut back on the raisins and currants and make up the amount with dried cranberries (or glace cherries, but the cranberries are better). I put some finely chopped candied ginger in one year, that was nice. If you don 't like the mixed peel, ditch that and use more cranberries and even dried cherries and blueberries.
2. 1/4 cup juice or rum for 12 hours....
3. I use strong dark molasses – the blackstrap variety – because I love the dark and slightly bitter taste it brings. If you’re less about molasses, use the lighter kind.
4. I bake it at least three or four weeks early then store it in the fridge in containers and pour dark rum on it every few days. It will seem fairly soggy, that's ok. Stop watering it about a week before you want to start serving it so the top dries out a bit. This is really the key to making it more interesting and fun than "normal" fruitcake.
5. The batter gets very hard to stir once you’re adding the flour & fruit in. Use serious wooden spoons. I usually lose at least one spatula or wooden spoon to it every year.
6. I bake in loaf pans and it takes 2 to 2 and a bit hours. It’s hard to tell if it’s done – I do the tap the underside trick, like loaves of bread.
Wednesday, November 10, 2010
On The Road Again: Shall We Knit

This weekend I'm back to teach some classes at Shall We Knit in New Hamburg, just outside of Kitchener.
I had a marvelous time when I was there in April, and I'm thrilled to have been invited back.
I'm teaching my ever-popular Fearless Finishing class, and my Yarn Knowledge class. Yarn Knowledge is a newer class on my list, and I developed in response to the questions I hear regularly from knitters - newer and established alike...
- Mystified by all these terms - double knitting, worsted, aran? Unsure whether fingering is a potato or a yarn? Wondering why you should care about whether a yarn is superwash or not? How do you go about finding a substitute yarn for a pattern? This class will explain yarn terminology, help you understand yarn substitution and gauge, and make you a more confident yarn shopper and knitter.
Info on both classes here.
Some spaces are still available.
And I'll be back there in January for Continental Knitting, and my wild and crazy Two Socks In One Class.
Monday, November 08, 2010
Qiviut Sock Yarn
Go look at today's Knitty Blog post - Qiviut sock yarn! And if you don't know why that's exciting, that's extra reason to read it.
The Naked Sheep: So Long and Thanks for All the Fish
Yesterday I taught my last class at The Naked Sheep in Toronto. I've been teaching there since it opened, in mid 2004.
This wonderful little yarn shop in Toronto's Beaches district is closing this month, and I'm sad to see it go.
I am so very grateful to both Lorena, the original owner,
and Lisa,

the current owner, for the opportunity to teach there all these years.
The Naked Sheep gave me my big break - it was the first shop I taught at. The Naked Sheep introduced me to Noro. The Naked Sheep allowed me to mingle with so many wonderful people. I will miss my classes there, and my Sunday morning gang, and the excellent team who worked there.
It's thanks to the Sheep that I am the knitter and teacher and designer I am. Without the Sheep, I'd still be stuck in a cubicle somewhere in IT-land, wishing I could knit during conference calls.
The Sheep was one of the first of the current generation of knitting shops in Toronto - shops that appeal to newer knitters, to a younger crowd. In the 1990s in Toronto many of the knitting shops closed down, and only a few hardy stores remained. When she opened in 2004, Lorena had a store that appealed not only to established knitters, but also created an environment that lured in younger non-knitters. The Sheep's beginner classes and Wednesday knit nights remained amazingly popular all throughout the life of the store. When Lisa purchased the store, her enthusiasm and energy took the store to a new level and she did an amazing job of running it while holding down a full-time job and being a mother to two very active kids.
Many, many knitters in Toronto are knitters because of the Sheep.
All I can say is thank you.

This wonderful little yarn shop in Toronto's Beaches district is closing this month, and I'm sad to see it go.
I am so very grateful to both Lorena, the original owner,
and Lisa,
the current owner, for the opportunity to teach there all these years.
The Naked Sheep gave me my big break - it was the first shop I taught at. The Naked Sheep introduced me to Noro. The Naked Sheep allowed me to mingle with so many wonderful people. I will miss my classes there, and my Sunday morning gang, and the excellent team who worked there.
It's thanks to the Sheep that I am the knitter and teacher and designer I am. Without the Sheep, I'd still be stuck in a cubicle somewhere in IT-land, wishing I could knit during conference calls.
The Sheep was one of the first of the current generation of knitting shops in Toronto - shops that appeal to newer knitters, to a younger crowd. In the 1990s in Toronto many of the knitting shops closed down, and only a few hardy stores remained. When she opened in 2004, Lorena had a store that appealed not only to established knitters, but also created an environment that lured in younger non-knitters. The Sheep's beginner classes and Wednesday knit nights remained amazingly popular all throughout the life of the store. When Lisa purchased the store, her enthusiasm and energy took the store to a new level and she did an amazing job of running it while holding down a full-time job and being a mother to two very active kids.
Many, many knitters in Toronto are knitters because of the Sheep.
All I can say is thank you.
Friday, November 05, 2010
My Old Nemesis, We Meet Again
In the fall of 2005, I knitted a scarf with KidSilk Haze.

The idea was that since I had a winter coat that was fairly... err... bold in its patterning, I needed black accessories to go with it.
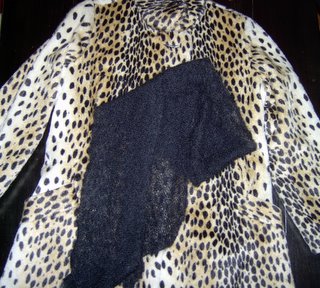
It may well have been the single most miserable knitting experience of my life.
Awful.
The post I wrote back then seriously undersells the pain I suffered. I refrained from grumbling about how many times I changed needles to find ones that worked well with the yarn. I never did find a needle that made it an enjoyable experience.
It was so awful I remember it well. Bitterly. I shudder at the thought.
And I was desperately unhappy with the finished result - it wasn't wide enough, I'd stopped short of the intended length, and the cast off was too tight. I put it away, and swore never to use the yarn again.
I had such a miserable time that I regularly warn people away from the yarn.
I nearly staged an intervention once when I saw a mother teaching her daughter to knit with this yarn.
But then, oh then... I found the scarf again this fall. And I wore it for the first time since the fall of 2005.
Oh dear god, it's gorgeous. It's light, and ethereal and warm and actually very nice. It's still too narrow to wear as I had intended, but it looks really rather great as a little cravat sort of thing.
So... as I'm noodling on a project I need to demonstrate the use of biasing to a newer knitter, I ponder again my garter stitch scarf. Am I crazy to think I should recommend this (with firm notes on appropriate needle choice and pointers on how not to lose your mind) to new-ish knitters?

The idea was that since I had a winter coat that was fairly... err... bold in its patterning, I needed black accessories to go with it.
It may well have been the single most miserable knitting experience of my life.
Awful.
The post I wrote back then seriously undersells the pain I suffered. I refrained from grumbling about how many times I changed needles to find ones that worked well with the yarn. I never did find a needle that made it an enjoyable experience.
It was so awful I remember it well. Bitterly. I shudder at the thought.
And I was desperately unhappy with the finished result - it wasn't wide enough, I'd stopped short of the intended length, and the cast off was too tight. I put it away, and swore never to use the yarn again.
I had such a miserable time that I regularly warn people away from the yarn.
I nearly staged an intervention once when I saw a mother teaching her daughter to knit with this yarn.
But then, oh then... I found the scarf again this fall. And I wore it for the first time since the fall of 2005.
Oh dear god, it's gorgeous. It's light, and ethereal and warm and actually very nice. It's still too narrow to wear as I had intended, but it looks really rather great as a little cravat sort of thing.
So... as I'm noodling on a project I need to demonstrate the use of biasing to a newer knitter, I ponder again my garter stitch scarf. Am I crazy to think I should recommend this (with firm notes on appropriate needle choice and pointers on how not to lose your mind) to new-ish knitters?
Subscribe to:
Posts (Atom)


