Saturday, August 11, 2012

New Pattern: The Lace 102 Sampler

The original, about
5 x 14 inches.
I teach a lot of lace knitting classes, and in my advanced lace class, we work a smaller sampler project. It's a fun and quick knit, and allows the knitter to experiment with a lot of different lace patterns. It's a small piece - too big to be a bookmark, too small to be a scarf.

Several students requested that I turn the pattern into a scarf... and so I did.

In addition to being a beautiful and fun knitting project, this sampler is designed to be a learning tool for lace knitters, as an option for those who want to expand their lace skills but can’t make it to one of my classes in person.

It features a variety of lace stitch patterns, all challenging in different ways, to allow you to experiment and learn some new techniques.
A proper scarf!
I’ve used some all-over patterns, and some single lace motifs worked on a plain background; I’ve used some lace with a stocking stitch ground (that is, with purl WS), some with a garter stitch ground (with knit WS); there are patterns worked on one side only, and patterns worked on both sides. There are patterns with variable numbers of stitches, and a pattern that featured delayed decreases. I’ve used some tricky and unusual stitches like s2kpo and p2tog tbl. And there are the often-feared Estonian nupps.

The sampler ends with an applied edging. Although this project is best tackled by a knitter with lace experience, everything is explained in sufficient detail that even an adventurous newer knitter could take it on.

Click to see the detail.

All pattern stitches are charted. (Some but not all have written instructions, also.) If you need a tutorial in chart reading, see this post on this blog.

Each individual pattern section includes detailed instructions and tips and tricks for handling the particular challenge of that pattern.

Using a single skein of sock yarn, it's a great way to grow your skills as a lace knitter, and have some fun along the way. The pattern has been thoroughly tested by both seasoned and newer lace knitters.

Available for $7.50 on Patternfish and Ravelry.

All the stitch patterns....


Wednesday, August 08, 2012

Leftie Knitting

Met a new student last night - the lovely N., who is a natural left-handed knitter. By that, I mean that she learned to knit left handed. She knits as a precise mirror of what I do. It's fabulous elegant and somewhat weird to watch her.

She came to my class with a friend, J., who is also left-handed. J. knits as I do, in the traditional right-handed manner. This caused some laughter and puzzlement in the class. Mostly the laughing was at me, as I tried to demo the M1R and M1L in the left-handed manner. I'm pretty clumsy with my left hand, so although I got the job done, it was neither fast nor elegant.

There are a few options for teaching knitting to the left-handed.

There's the "damn the torpedoes" method: teach 'em to knit the "normal" way - right handed, English. This is how my left-handed Mum knits.

Continental - yarn in left hand,
but needles still right-hand dominant.
There's the "a nod in your general direction" method: the usual needle orientation, but Continental-style, with yarn in left hand.

And then there's the "doing what comes naturally" method: mirror-image knitting.

Each is equally good; of course, there are some pros and cons. The "damn the torpedoes" method works best for a knitter who is reasonably strong with both hands, as you're still requiring precision movements from the non-dominant hand. The "nod in your general direction" method is a good mid-point, as it relies less on the right hand, and more control is with the dominant left hand.

Image excerpted from Trauermei tutorial.
For some lefties, however, knitting right handed just feels wrong. It feels unnatural. For those knitters, learning "true" left handed knitting is the best option. It's less common, and there are fewer resources, but I do like these two tutorials created by Trauermei:
Part 1 - casting on.
Part 2 - the knit stitch.

There is a downside to this method, however, which is why it's less common (other than the absurdity of watching a rightie trying to teach it): the stitches are oriented the other way on the needle so that decreases lean the other way. A leftie's k2tog leans left rather than right; a leftie's ssk leans right rather than left. For many purposes, this isn't too much of a problem, but when it comes to lace it's a critical difference... So although there's a gain in ease of execution, there's a loss in terms of ease of chart reading... decreases have to be switched.

Each method has something to offer, and as with so many things in life, there isn't a single "right" answer. If you're left-handed, it's definitely worth trying all three.

Are you left-handed? What do you do?

Kristi has written more on this topic for Knitty, and she lists some other resources.

Saturday, August 04, 2012

On M1 and KFB, On Repeats & Clarity

Had an email this week from a knitter working one of the patterns, in my book, the Slouchy Hat.

She asked about the increasing.... she said that my pattern wasn't working out.

She was starting with 68 sts, and the instruction is as follows:

(K2, m1) around. 102 sts.

Our knitter reported that it just wasn't working. She reported that she was ending up with 90 stitches, and she'd tried it more than once.

I knew immediately what she'd done. It would be cheeky of me to suggest that she go and read the Shaping Chapter of the book, but this is one of the topics that this chapter addresses.

I replied to the knitter's email, and asked if perhaps she'd used KFB. Yup, that was it!

Here's the thing: a KFB is not the same thing as M1, and they are absolutely NOT interchangeable.

They are both increases, yes, but differ in a key way KFB takes one stitch and makes it into two, and M1 makes a stitch from nothing. (If I'm feeling cute, I refer to M1 - "make one" - as "magic one", as in "conjure a stich out of nothing".)

This matters, because using a kfb uses up one stitch of the round, and my pattern assumes you don't.

(I highly recommend you spend some time on the increases page of knittinghelp.com, and watch the video for my favourite M1 method here.)

So in this case, it works as follows:

(K2, m1) puts a new stitch between every pair of stitches - adding 34 to the

existing 68, to get the 102 required.

(k2, kfb) makes 90 stitches. Each group of (k2, kfb) takes 3 stitches and makes it into 4, meaning you work as follows:(k2, k2b) 22 times (getting you across 66 of the 68 stitches), and then presumably our knitter would have just worked k2 at the end of the row. 68 + 22 = 90.

Obviously, our knitter knew that something was up when her stitch count was off, and I'm glad she got in touch.

(This is also why it's always good to give a stitch count in a pattern after any increases or decreases, of course.)

But there was another, perhaps less obvious clue that something was amiss...

For me, when I say to work some kind of repeat around a round or across a row, e.g. (k2, m1), or (k2, p2), or (ssk, yo, k3, yo, k2tog) or whatever, I expect that you will come to the end of a repeat at the end of the row/round.

It's a given to me that if you aren't at end of a repeat at the end of the row/round, then that's a sign that something isn't right. In this case, there weren't enough stitches left to work another full repeat of the pattern stitch the way the knitter was doing it, and so that should have been a red flag.

Now that didn't occur to our knitter because, frustratingly, it's not a standard pattern writing convention. I make sure all my patterns, and the patterns I edit adhere to this, but it's not nearly common enough.

This is one of those details that some feel is perhaps a little too.. shall we say... anal-retentive... but I figure it's easy enough to do, and can only help the knitter.

Ok, so let's say I did want to do it the way the knitter had tried... I would have written it as follows:
[K2, kfb] to last 2 sts, k2.

Simple, and clear, no?

Yes, it does take a bit more thought and work, but I figure it's worth it. After all, the clearer my patterns, the higher the chance of the success the knitter has. And the more successful the knitter, the more likely they will be to buy my second book...

UPDATE: Two excellent reader comments.

1) Yes, the kfb would look different than the M1 - M1 is intended to be reasonably invisible, and kfb leaves a distinct bump in a stocking stitch fabric.

2) Another commenter suggests that a knitter could use kfb instead of the M1, "as long as he or she is paying attention" - change [k2, m1] to [k1, kfb]. This is true - you'd get the required number of stitches, absolutely - but as above the kfb does look different. Plus it does indeed require "paying attention" - which is not necessarily what a knitter wants (or is prepared to do).

In summary, I only recommend using kfb when the designer specifically calls for it.

Wednesday, August 01, 2012

A knitter's worst nightmare?

Mauricio, my favourite waiter at my favourite restaurant told me an excellent story today.

He saw me knitting and said that I reminded him of his Nonna, his beloved grandmother.

Mauricio is the eldest child in his family, and for four years enjoyed being the only child. Midway through his fourth year, his parents proudly announced that a baby was on the way, and that Mauricio was to be a big brother.

His Nonna, an avid knitter, was thrilled, and did what so many expectant grandmothers do: picked up her needles to start making a blanket for the new arrival.

Mauricio wasn't quite so happy. As is the case for many first children, he wasn't at all sure what this was going to mean for him. He was upset.

How did he choose to express his unhappiness? He would sneak into his grandmother's room and undo her knitting...

Every day, she would make some progress on the project, and the next day, little Mauricio would undo it. Apparently, it became, in the eyes of a small boy, a rather excellent game of hide and seek: where did Nonna put the knitting today?

I can only imagine the mess a four-year-old would make...

And I can also imagine that a wise and loving grandmother would nod, smile, hug the boy - and then find a very high shelf to put the project on.

Friday, July 27, 2012

A perfect match of yarn and pattern

This is one of those times when a knitter's yarn choice is better than my original....


This is the Turtle Purl self-striping sock yarn in the Burberry colorway, used for my Herringbone scarf.

Seriously, how good is this?

Very proud of Brenda, and I can't wait to see her finished project.

Wednesday, July 25, 2012

Project Bags: Little Things I Love

I carry my knitting around. A lot. I'm a public transport user, and I never go anywhere without at least one knitting project.

I've used any number of little project bags to nestle into the corner of my purse: everything from purpose made knitting bags, to ziplock bags, to repurposed camera bags, you name it.

I met the lovely people of Della Q at TNNA, and they introduced me to a line of theirs I hadn't seen before: the Edict Project bags.

Naturally, the Sock Project bag was the most appropriate. It makes me happy.

In addition to being adorable, it's very practical. Large enough to hold the yarn, the sock-in-progress, any pattern notes, and the sock's mate (so I can count and make sure I've worked the same number of ribbing rounds on both), it's still small enough to tuck into my purse.

Della Q hass a whole range of these 'Edict' project bags.... some identify what you're working on: "Hat Project", "Sock Project", "Scarf Project", "Random Project".

Some clarify the state of your knitting: "Tangled String", "Handknit for you", "Knit with Love".

And some declare the state of your mind: "Shh.. I'm counting", "Naughty Knitter", and "Paws off My Knitting".

But best of all may be this one: "Cheaper than Therapy".

Thursday, July 19, 2012

Reader Mail: On Stopping, or Not

I recently met a knitter, D., in a class.

We've been having an email discussion, and she made a passing comment at the bottom of her email...
"BTW, for when we knit late at night and we don't want to let go and stop... any suggestions?"
It made me laugh, because I knew exactly what she meant... I bet every knitter does. That compulsion to keep going, that need to work one more row, to get to the next step, to knit on, late into the night, when you know you should be asleep.

I'm often knitting to a deadline, working on design commissions and samples. For those projects, there's sometimes late nights. Right now, I'm working on a pair of mittens that need to be completed for photography, and I'm knitting on them every spare moment I get. Which includes knitting late at night. I can't stop, because there's a deadline.

But it's not the same. What D. is talking about is that compulsion to keep going on something for the sake of it. Because you're enjoying it. Because you don't want to stop.

This happens to me less often with knitting - because I am most often working on things I need to knit - but I suffer from it terribly when it comes to crochet.

I don't do much crochet professionally; indeed, I don't do much crochet at all. I rarely create crochet designs, and I don't often have the time to work on projects that aren't specifically design projects or commissioned work.  (This isn't a 'poor me' thing, I promise, it's just the state of my to do list.)

Because I don't really design crochet, when I do get to crochet, it's most often working someone else's project - those Noro crochet slippers, for example. And because I don't have a lot of spare crafting time, so if it's project from someone else's design, I need to really really want to work the project to push off work projects... and when I really really want to work the project, I really really want to keep working the project... and I don't want to let go and stop... There's a "just one more" element to crochet, too - just one more round, just one more motif, just one more slipper....

And so no, D., I'm sorry - I don't have any suggestions. Just suffer along with the rest of us :-).


Monday, July 16, 2012

Foot Sizing Survey Results


It's been a long time coming - for which, apologies - but the results of the foot size osurvey are now available, Over at the Knittyblog. Not only the data, but I've done some analysis on what the results mean for sock knitters and sock designers.

Let me know if the info is helpful!

Friday, July 13, 2012

Photo of the Day Has Been Dormant: Back At It!

Make this the last but most important lesson in my quest to become a better photographer: you can't get better if you don't actually take any photographs.

I got back at it this morning.

There's epic construction along my usual commute to Friday morning class at the Purple Purl. I've been trying a new route, the College/Carlton/Gerrard streetcar, and there's a 10 minute walk done Jones Avenue towards the shop.

It was a hot, bright morning, and I was looking around the unfamiliar neighbourhood as I walked. I loved the little peeks into the backyards through the alleys between the house.

This one seems particularly inviting: sunshine leading me down the alley, to an open gate, through which you can pass into a lush green garden. Urban oasis indeed.


I'm pretty pleased with this one: no edits made at all. I sort of wish the recycling bins weren't there, but they do add to the "urban-ness" of it all.

Sunday, July 08, 2012

Hoist with my own petard

The problem with being opinionated about things is that they come back to bite you sometimes. And I've been bitten.

It's not uncommon to see an instruction like:
Knit, decreasing 12 sts evenly across the row.
I don't like these sorts of things, particularly for patterns aimed at less experienced knitters, because they can seem awfully intimidating - and they require either math or a high degree of confidence to power through. I understand why designers use them, absolutely - mostly to save space in the pattern - but they're scary for less confident pattern readers.

Now, the important thing to know is that ultimately, if the designer isn't specific how about to decrease, or where, then it doesn't really matter. You just need to get to the right number of stitches.

I'm working on some new patterns, with multiple sizes and multiple gauges, and I've found myself in need of the following instruction:

Knit, decreasing 6 (6, 6, 6, 8)/6 (8, 10, 10, 10) sts evenly around. 34 (36, 38, 42, 44)/26 (28, 30, 32, 34) sts.

The problem is that this particular pattern is aimed at newer knitters, and I realized that there was no way I was going to let myself get away with this. So I had to write them all out - 10 different rounds! It took a surprising amount of thinking.

The final decrease round.
Fingering weight version
1st size: (K5, k2tog, k4, k2tog, k5, k2tog) twice. 34 sts.
2nd size: (K4, k2tog, k3, k2tog) 4 times. 36 sts.
3rd size: (K4, k2tog) 10 times, k4. 38 sts.
4th size: (K3, k2tog) 10 times. 40 sts.
5th size: (K3, k2tog, k4, k2tog) 4 times, (k3, k2tog) twice.

Worsted version
1st size: (K3, k2tog, k4, k2tog, k3, k2tog) twice. 26 sts.
2nd size: (K4, k2tog, k3, k2tog, k4, k2tog) twice. 28 sts.
3rd size: (K4, k2tog) 6 times around. 30 sts.
4th size: (K4, k2tog, k5, k2tog, k4, k2tog) twice. 32 sts.
5th size: ([K3, k3tog] 3 times, k4, k2tog) twice. 34 sts.

I haven't proofread them yet, but I think I got them right. I hope. But most of all I hope this makes my pattern easier to work.

Thursday, July 05, 2012

Interweave Knitting Lab California

I'm over the moon that I've been asked to teach at Interweave's fabulous Knitting Lab event in San Mateo, California this coming November.

I'm teaching two of the classes for which I am best known:

Two Socks In One: The War & Peace Method

The Sock Knitter’s Mount Everest? This class teaches the legendary technique for knitting two socks at the same time on the same needles, one inside the other, as mentioned by Tolstoy in War and Peace.  In the class, we’ll work a pair of mini socks using this amazing technique.  The design we work is top-down, but the techniques I demonstrate are easily applied to toe-up knitting.
Designing Custom-Fit Socks
Liberate yourself from pattern books, and ensure your socks really fit properly! Learn how to create a top-down or toe-up sock pattern for any yarn, and for any foot.  We’ll cover knee socks, and discuss special fit requirements like high arches, flat feet, skinny and not-so-skinny ankles. I’ll show you how to apply pattern stitches like lace, cables and colorwork, and how to manage differences in gauge and fabric stretch.  You’ll leave the class with a set of templates and guidelines for all your sock fitting needs.


and a new one:

Fair Isle Bootcamp: Design Your Own Fair Isle Wristwarmers 

This class will teach you everything you need to know to be a confident Fair Isle knitter. We’ll review the history of Fair Isle knitting, and discuss the types of patterns and how they evolved. Through practice swatches, you’ll master reading the patterns and charts, and working with multiple colors - both one-handed and two-handed methods, both in-the-round and flat. In the second half of the class, you’ll be provided with the motifs, templates and yarns to design and create your own pair of unique fingerless mitts.


More info about the event here.

Tuesday, July 03, 2012

What I'm Knitting: Godzilla Ridge

Have you read my post over at Knittyblog?


This project is making me very happy, and it's coming along brilliantly.

I don't know why I always end up knitting heavy blankets or similar in the summer. Over the weekend, in temperatures in the mid-30s (Celsius), I was working on a bulky-weight cowl...

Wednesday, June 27, 2012

Chicago, Chicago!

With apologies to Frank Sinatra...

"Chicago, Chicago I'll show you around - I love it
Bet your bottom dollar you lose the knittin' blues in Chicago, Chicago".

Yes, I'm off to Chicago this October, to teach at Vogue Knitting Live.  I'm teaching several classes: Pattern Writing Skills, Design Your Own Custom-Fit Socks, Socks for Absolute Beginners (really! I can get beginners knitting socks! I promise!), Top Down Socks 101 and Toe-Up Socks 101.

I'm very excited - the class list is astounding and I'm honoured to be included with such luminaries as Nancy Bush, Sally Melville and June Hemmons Hiatt. More info here.

Tuesday, June 26, 2012

The Anti-Mentor

Totally off-topic:
This story isn't about me, but it begins with me.

I used to have another career. In an industry I didn't really fit into. I liked a lot of the work, but I never felt passionate about what I did, and never really felt like I fit in.

About 15 years ago, my paths crossed with Michael O'Connor Clarke. He hired me to do a job for which I had neither the experience nor the qualifications. I'm still not sure how it turned out for him, but it was terrific for me: I got some amazing experience, learned a whole load of new things, and found myself a mentor.

Michael was my mentor for a few years, helping me out as I muddled my way through, trying to figure out what I wanted to be when I grew up. And he listened to me and supported me when I went through a difficult time in my personal life.

And then at lunch a few years ago, he delivered his final and best act of mentorship: he told me to go away. We both knew that I was unhappy and hadn't really found my place in the tech world, but I didn't have the courage to get out.

He didn't want to be my mentor anymore because he didn't want me to be in the position of needing his help. He didn't want me to be in his industry anymore.

I'm not, and I'm happier and more fulfilled professionally than I ever was in my previous career. And Michael gets credit for helping me make that jump. I'll forever be grateful to him for that.

It was with shock and sadness that I learned yesterday of his illness. Michael has been diagnosed with esophageal cancer, a very aggressive and difficult to treat cancer. I'm still processing this, I'll be honest. There is a call for support that has been organized by his friends and colleagues.

And old and very dear friend lost his father to brain cancer recently, too. I just don't know what to say.

Actually, I take that back. I do know what to say: Fuck cancer.

Wednesday, June 20, 2012

On the Road

This week I'm off to Columbus, Ohio, for the TNNA industry conference.

Other than TNNA, Columbus is notable as being the home of the much-loved Jeni's Ice Cream... I've heard so much about it. Apparently it's a highlight of the event, and people love this ice cream so much that they have it shipped across the country. (Image shamelessly borrowed from their site.)

I've stocked up on Lactaid and I'm very much looking forward to trying it!


Of course, there are other, more sensible reasons to visit Columbus during the humidity season: so many knitters to meet up with, so many new yarns to fondle and drool over, so many new products to see... and so many opportunities to talk up my first book, and the coming second book... yes, that's right, I'm working on a new book. More details to come!


Did you know that this week marks Knitty's 10th anniversary? My first contribution - "Socks 101" was the Spring of 2005 issue, and I've been honoured to have been a member of the team since 2008.

Monday, June 18, 2012

Kate Learns to Use Her New Camera

Have you been following the series I wrote for Knittyblog on learning to use my new camera?

Part 1
Part 2
Part 3.

Some helpful tips in the comments, too - make sure you read those!

You can see of the results of these efforts on my Photo A Day page, too. It's listed in the Nav Bar on the left.

Tuesday, June 12, 2012

"You're doing it wrong"

As a knitting teacher, these are words I work very hard not to say.

And yet I hear stories every week about non-teachers who are more than happy to say them. They are most often meant to be kind and helpful, and are delivered with the best of intentions. But in many cases they are less than helpful.

Even if the speaker is correct that the knitter is indeed wrong, it's a pretty discouraging message to hear. But sometimes, wrong turns out to be very, very right.


While I playing Knit Guru at Shall We Knit this past weekend, I met a knitter. She approached me nervously, saying that she "knitted funny", and needed help getting sorted out.

She told me her story: she learned to knit when a girl, and happily knitted along, on and off over the years. And then a neighbour, a woman from the former Yugoslavia, ripped her knitting out of her hands and said those terrible words... "You're doing it wrong."

So our knitter learned to knit again from her neighbour.

She put her knitting down again for a number of years, and has recently restarted. She's been knitting with a group of friends who once again told our now very confused friend that she was doing it wrong.

She came to me anticipating that I would help her "get it right".

It gave me great pleasure to tell her that she was doing it right, and she needn't change a thing.

You see, there's more than one way to knit.

Most of us in North America and the UK knit - regardless of whether yarn is in left or right hand - knit a specific way: our stitches are oriented so that the right leg is at the front of the needle, and we work into the front loop. Easy.

But there's another way to do it - and it's generally accepted as being a faster and ergonomically more efficient way of doing things: Combination Knitting. It's also known as Eastern Uncrossed, and it's common in the far east of Europe (the former Soviet Territories) and the "near east" of the Middle East. I know a lovely Iranian knitter who works this way. And everyone who works this way is blindingly fast.

(image from Annie Modesitt's website -
she created it, she owns it)
In essence, you wrap your purls the "other" way, and therefore your knit stitches are seated the other way - right leg at the back of the needle. The angle to work the knit stitch is more convenient, and it goes without saying that the purl stitch is easier to do.

So my new friend left happy - and perhaps even a little smug - upon learning that she wasn't just doing it right, she was doing it better!


If you're interested in this, or suspect you might indeed be a 'combinationer', please visit the website I've linked to above - the author, Annie Modesitt, is the master of Combination Knitting.

Wednesday, June 06, 2012

What Are You Doing for WWKIP Day?

It's World Wide Knit In Public Day starting on Saturday, running for a full week. We knitters clearly have the ability to bend time...


I will be at Shall We Knit in Waterloo, participating in their activities. There will be a bake sale, manicures (using Soak’s fab new kit), an Indigodragonfly trunk show and dyeing demonstration, sales and other shenanigans. I’m going to be playing Knit Guru Kate, offering assistance to any and all knitting problems for $3 for 5 minutes. (If I can’t answer the question, it’s free!) All proceeds are going to Canadian Breast Cancer research.

Did I mention there was a bake sale?

And if that's not enough, on Sunday, I'm teaching two classes:

There's Continental Knitting in the morning, and my Herringbone Lace Shawl in the afternoon.

My Herringbone Lace Shawl is an ideal first lace project, it introduces you to safe, easy and fun lace knitting. I teach you about the magical top-down shawl works. And it's great way to use up those single skeins of sock yarn....

Register for either class here.

Friday, June 01, 2012

Swatching for Gauge: Everything You Wanted to Know But Were Hoping You Could Just Ignore...

Ok, I've gone on at length about why you have to check (and match gauge). And now to answer the first question: How? And what do you do about it?

At its most basic, you swatch to make sure you're using the size of needles that's right for you. That's all.

Step 1. Knit a swatch.
How many sts and rows are you supposed to get? Take that number and multiply it by 1.5 to 2. E.g. for 18 sts/24 rows, cast on about 30 sts and knit until the piece is about 6 inches long. Use the needles recommended in the pattern to start. 'Recommended' is the key word here - these are the needles that the designer used to get gauge, but you might knit looser or tighter. Work in the pattern stitch specified; most often stockinette stitch.

Step 2. Wash the swatch.
Oh yes. Are you going to ever wash the garment? If so, you need to wash your swatch. Many fabrics can change quite radically with washing: superwash wool stretches out a fair bit, cottons can shrink up and change shape; linens and hemps relax. If your garment fits you before you wash it, it's quite likely it won't fit after you've washed it.

(This means that the garment that comes off your needles might not fit until you wash it the first time. Cool by me, since you should wash the pieces before you sew them together anyway.)

Oh yeah, and let it dry before you measure it. Like, overnight.

Step 3. Measure the swatch.
Using a ruler - not a tape measure, they can stretch - measure out 4 inches and count all the sts in the four inches. Including fractions of stitches. Fractions matter very much.

And then measure rows. Same deal, including fractions.

Step 4. Consider your plan of action
Have you matched gauge? Raise a glass! Eat a cupcake! Give yourself a round of applause! You're ready to start knitting.
And by "matching gauge" here I mean PRECISELY the right number of sts in 4 inches, and pretty much the right number of rows in 4 inches. Dirty secret: there's a bit of room for fudge in rows - if you're within about 10% of the required number (e.g. 28 instead of 26), you'll be fine for most purposes.

Are you off? By how much? If you're within about 10-15%, then a needle change should get you where you need to be. If you're off by more than about 10-15%, chances are you're going to need to change yarn. Changing the gauge of a fabric that much is likely to affect the fabric too much.

Too many stitches?
You're knitting too tight. (You're fitting more sts into four inches than you should have, therefore they are too small.) Move up a needle size and start again.

Too few stitches?
You're knitting too loose. (You're fitting fewer sts into four inches than you should have, therefore they are too big.) Move down a needle size and start again.

Frequently asked questions:
OMG. Are you telling me I have to do this all over again? Are you out of your mind?
Frankly, your gauge should never be a surprise. That is, I start measuring once I've got an inch or two of my swatch worked to get a sense of whether I'm even in the vicinity. If I'm not; I'll stop right there and restart. I've even been known to wash a half-knitted swatch on the needles.

Will I run out of yarn?
Likely not, but hang on to your swatches and if you need the yarn as you get near the end of the project, undo them.

Isn't this a lot of work?
Well, it might take up an evening, but it's significantly less work than knitting a sweater that doesn't fit. (See my post about me being unsympathetic on this point... )

Wednesday, May 30, 2012

More on gauge & knitting another size: a very good question for a commenter

Following up on my last post about gauge and the perils of knitting another size...

In response to my points about the danger of having to add more increases to the sleeve, that it might make the sleeve too long, a commenter asks a reasonable question:
'With a few calculations, though, surely you could just knit the number of rows that would give you the correct length for the size you actually want?'
Absolutely, of course you can adjust the length of the sleeve. It's not that hard, relatively speaking, and knitters who are comfortable with the math do this all the time!

But my point was this: knitters often believe (hope?) that they can just work another size and have it magically work out, with no math at all. And as my example illustrates, and your question supports, this just isn't true.

Another reader has asked for some more basic guidance on checking gauge and counting - I'll post on this in the next day or two. Any other questions I can answer?

Tuesday, May 29, 2012

"So just knit a larger size"

When a knitter can't match gauge for a garment pattern, it's often suggested that they compensate by simply knitting a smaller or larger size of the garment.

I hate to burst your bubble, but I do NOT advise this strategy.

Here's why: your garment will be the wrong length and your sleeves won't fit into your armholes.

Let's use an example: Cheesy Puffs from an early issue of Knitty. There are four sizes - M, L, XL, XXL.

Let's say I want to make the L size, with a finished chest of 48 inches. And I can't get the called-for gauge of 13 sts in 4 inches, I'm getting 14 sts instead. This means that my fabric is smaller than it should be.

So, I think to myself: I'll just knit the larger size.... that will work out ok, won't it? It's only one stitch and one size, how much trouble could it be?

You'd be surprised.

Problem #1) If you knit the XL you'll get the XL length. The vast majority of garment patterns are written by distance...  (not numbers of rows); that is, it's totally independent of gauge. So for this specific pattern, if I'm following the XL instructions, I'll work the back until it measures 18 inches before the armholes because that's what it tells me to do. But if it's the size L that I was aiming for, I'm an inch over - that size needs only 17 inches before the armhole.

This one is pretty easy to fix, but it does require some thinking and planning  ahead. It requires you to read through your pattern and check all the various lengths, compare them for the two sizes, and adjust the XL sizes to use the L lengths.

Problem #2) Your sleeves won't fit into the armholes.

Again, the armholes are given by distance: for the size L, you have to work 11 inches after the armhole shaping. And the top of the sleeve is calculated carefully to be 22 inches across - twice the depth of the armhole. For size L, the sleeve is 73 sts at the top, at 13 sts/4 inches. (And 13 sts/4 inches = 3.25 sts/inch.) Since the sleeve is worked flat, take off the 2 sts you'll lose in your seam, so that gives you 71 sts. And 71 sts/3.25 sts per inch = 21.9 inches.

But if I work the size larger, I've got 75 sts at the top of the sleeve, at my gauge of 14 sts/4 inches. (And 14 sts/4 inches = 3.5 sts/inch.) Take off 2 for the seam, which gives me 73 sts. And 73 sts/3.5 sts per inch = 21.4 inches.

But if I've been following the instructions for XL, then I've been told to work 12 inches before the armhole shaping, so now I'm trying to fit a 21.4 inch sleeve into a 24 inch armhole.

Can you fix it? Sure, but at that point you're basically redesigning the garment. You'd need to adjust the depth you work for the armhole (11 inches instead of 12, that's not too hard), but then you'd still need recalculate the number of sts you need for the top of the sleeve so that it fits that depth, since the 75 I'd been working with is still too small for the 22 inches. I'd want 22 inches * 3.5 sts/inch =  77 sts. Which means that I'd need to recalculate the increases for the sleeve - since working an extra repeat of the 4-row increase pattern on the sleeve may well make the sleeve too long... and so it goes.

And this is for a straight armhole. The situation only gets messier for a shaped armhole and a set-in sleeve.

Surely just knitting another swatch is easier?


Sunday, May 27, 2012

Sometimes I may seem unsympathetic and unforgiving...

I've had a couple of conversations about gauge in classes in the last few days, and it seemed pretty clear from the reactions of my students that they felt that I was being strict and unsympathetic.

The truth?

I am. On the topic of gauge, I am unyielding.

I'm entirely sympathetic to those who don't understand what it's all about. I'm very sympathetic to those to who don't understand why it's important. And I'm happy to spend as much as needed addressing questions on how to do it.

I took me years to wrap my head around the issue of gauge and how it related to why my hats were too small. And then a bit longer than that to figure out how to use that knowledge to ensure that my hats were no longer too small.

But I am entirely unsympathetic to those who do know what's what - and then tell me that they find it too much work to swatch. I have to tell you, I don't find it particularly cute or funny when a knitter tells me that they don't bother swatching. (More often than not, this 'confession' is delivered with a giggle, like it's a cheeky and harmless transgression.) Why? Because I know that next year I'm going to hear a story about a garment that took months to knit but didn't fit, and how unhappy it made the knitter. Often I have these two conversations in the same class - (different knitters, obviously).

The longer I teach knitting, the sharper my reply: "Do you care how it fits?".

Because it's as simple as that. If you don't swatch for a garment you simply cannot know if it's going to be the right size. 

Now: the corollary to this is that if it's not a garment - or not an item where a particular size matters, for example a scarf or a shawl - gauge doesn't matter.  I don't mind if my scarf is an inch wider than the pattern says it should be. (It doesn't mean I don't still knit a test piece to assess the fabric, to make sure I like how it looks; and sometimes that test piece is just the first few inches of the scarf. But I don't swatch for gauge. But that's a topic for another day.)

I had a related conversation this weekend with knitters about working a project from a kit. The kit is for a certain size baby garment. One of the two knitters, S., had already made this garment from the same brand of kit, and remarked that she had a fair bit of yarn left over. Indeed, according to threads on Rav, this particular kit in this particular size had enough left over to make one size larger.  Excellent news!  B. and I joked a little about her needing to swatch - of course, I said. We were in a group, and there were several conversations going on. A few minutes later, S. and B. were chatting and S. told B. she really didn't need to swatch - it's only a baby sweater, after all, and it doesn't matter if it's the wrong size... if it's too big then all the better, and if it's too small it would be ok because she was making the larger size anyway.  (I general, I would agree - there's a bit of room for fudge with sizing a baby sweater.)

I think they were both a bit shocked when I stopped my conversation, interrupted theirs and very firmly said no. B. had to swatch. No question.

Here's the other thing about not knitting to gauge: knitting looser uses up more yarn.  Since B. was already pushing the limits of her kit by working the larger size, if she wasn't on gauge (or smaller), she was risking running out of yarn. To me, the equation is simple: spend less than an hour swatching to make sure you're on gauge, or spend 10 or 15 hours (or more) knitting a sweater you can't finish because you've run out of yarn.

So yes, if my delivery was sharp or harsh, I apologize. If I came across as unyielding - I'm not sorry one bit.

Saturday, May 26, 2012

Intrepid Knitter is Intrepid

Sallie took my "War & Peace" socks class at The Needle Emporium in the spring. She came back today for my Continental class so she could speed up her production.

Unsurprisingly, Sallie took to Combination knitting like a duck to water.  And she bought Principles of Knitting at my insistence.

I do love an Intrepid Knitter.

Thursday, May 24, 2012

California Revival Knits

One of the great things about being a Cooperative Press Author is the opportunity to meet and collaborate with my peers - other wonderful knitters with fabulous visions for changing the knitting world.

One of those wonderful knitters is Stephannie Tallent, also known as StephCat.

We met for the first time at Rhinebeck last year, and we immediately bonded over a mutual love of animals. Like many of us in this business, StephCat has another life: her other identify is as a vet. She nodded her head sagely when I told her about the escapades of our hound-dog Dexter - the look in her eyes said "well, he is a hound, what did you expect?" but she was too polite to say it out loud.

Steph and her husband have an English Cocker Spaniel, Rigel, who has also been known to indulge in a little mischief once in a while. And they have three beautiful Tonkinese cats, one of whom is featured in her book, California Revival Knits.


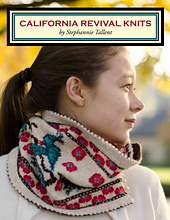
Yes, Stephannie just published her first book, California Revival Knits.

The book contains 14 designs, all inspired by California Revival style of architecture and design.

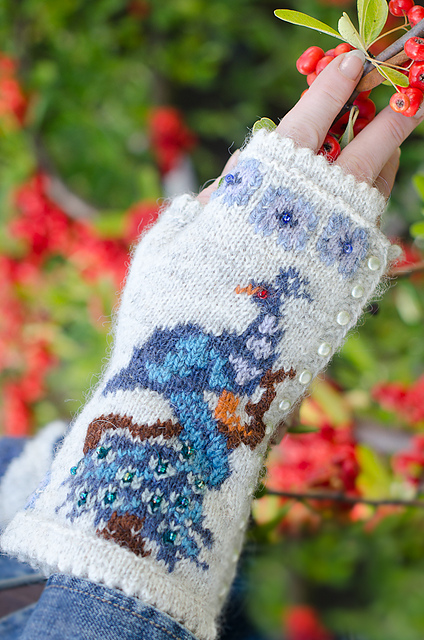
The designs are stunning.... these Peacock fingerless mitts are haunting my dreams....

but I think the best part of the book is Steph's discussion of the California Revival style and the inspirations for her designs. You can see all 14 designs on Ravelry.

Another thing we have in common is that we both work as tech editors for other designers - and we have the same trepidation of being tech edited ourselves.. After all, says the little voice in the back of your head, we should know better. In Steph's words: "...mostly I feel really stupid when someone else finds my mistakes. Invariably some are found. But then, I catch mistakes in other tech editor's patterns (I often swap tech editing with other designer/tech editors). I'm really leery of the quality of a pattern when someone blithely announces they don't bother using tech editors.m It just can be so hard to see your own mistakes, especially when you've totally immersed yourself in your pattern." I couldn't have said it better myself.

Also, this makes me feel better since Steph edited my own book, and I know she found mistakes.

I asked Steph about what she learned while writing the book, and I found something else we have in common: when we want to learn a new technique, we challenge ourselves to design with it... in particular, she mentioned that her intarsia skills are much better than the used to be. And with those Peacock Mitts, I can see why!

Did I mention how much I love the Peacock Mitts?

It's not all colourwork (phew!), there's some beaded knits, some fabulous twisted stitches and some really great lace. And you know that being a tech editor, Steph's patterns are well written and easy to follow.

Buy a digital or physical copy here.


Wednesday, May 23, 2012

Repurposing non-knitting things to be knitting things

Part 2 in a casual series...

I use a toothbrush holder to carry DPNs, crochet hooks and a set of short straight knitting needles. Notice the very glamorous duct tape I have used to close up the drainage holes.


It protects the needles and hooks, keeps them all together, and stops them from falling to the bottom of my knitting bag.

Monday, May 21, 2012

Taiyo Sock scarf

Last year, I published a scarf pattern using Noro Sekku.

I do love how the scarf looks, but I will be honest: the Sekku is about the thickness of thread, and the fabric only really looked good on 2.5mm needles. More sensible knitters than I pointed out that I was probably the only person in the world who would enjoy knitting a scarf on sock needles. And the resulting scarf was a little smaller than I wanted, too.

The stitch pattern is a very simple Shetland Razor Shell, with only one easy-to-work, easy-to-read lace pattern now.

I'd been meaning to knit another one, in a thicker yarn so as not to drive myself crazy, and the moment I saw color 23 of the Taiyo Sock, I knew I had found the right yarn.

And worked in the Taiyo, it's larger and not-so-crazy-making.


The pattern stitch causes the rows to zig-zag, making this fabulous 1970s-style chevron stripe - and worked in a vibrant 1970s autumnal palette (yet so modern, with a bit of Pantone's favourite Tangerine Tango), it's a fun summer accent. How good does it look with denim?

Pattern available for sale on Ravelry, for $4. It's an ideal first lace project, and I've included lots of tips on how to work it, and blocking to help out the first-time lace knitter.

It's worked with a single ball of Taiyo Sock yarn, on 3.5mm needles, and results in a scarf 11 inches wide and 60 inches long. Substitute any sock yarn you like, of course! One with long color runs like the Noro would work best.  I'm thinking it would look pretty tremendous in that Turtle Purl self-striping sock yarn... But yes, if you've got a skein of lovely sock yarn you want to show off, this may well be your pattern.

Thursday, May 17, 2012

The Knitting Doctor is In: WWKIP Day at Shall We Knit

June 9th, Shall We Knit in Waterloo is celebrating World World Knit in Public Day, and I'm thrilled to be part of the celebration. We are raising funds for breast cancer research - thinking of Sue and others in the SWK family who have been affected - and I'm for rent!

The Knitting Doctor will be in.... Have a tricky problem with your knitting? A technique you’ve always wanted to learn? A pattern puzzle you need help with? Come see Wisehilda Kate, The Knitting Doctor. Put your money in the jar and let the Dr. help!

I'm curious to see what questions people have. Will you be able to stump me? Should I be studying my copy of Principles of Knitting to prepare? Will I need to do tricky math? I'm looking forward to this!

Perhaps I should issue a challenge back.... ? How about this: if I can't answer your question, I will refund your donation and I will put the money in the jar myself.

There will also be food and merriment and perhaps even some knitting.

Tuesday, May 15, 2012

A New Project, A New Page

More later, but I've bought myself a proper camera, and have embarked on a project to learn how to use it.

I've created a Photo of the Day Page, (link also in the nav bar at left) and I will be posting a photo every day, as I experiment.  Yesterday, I played with shutter speed as Dexter and Daisy romped in our yard.

Expect lots of pictures of dogs and coffee.

Saturday, May 12, 2012

Substituting Yarns, Willy-Nilly

That's one of the many reasons I love lace knitting: so much scope for yarn substitution.

Here's a version of my Herringbone semi-circle shawl in Noro Ayatori - how fabulous is this? And only 3 balls! The colours are just perfect for me - I may have to make myself a third.


And another Miss Otis, this time in one skein of Handmaiden 4-ply cashmere. 170yds of this sport-weight yarn gives a piece about 13 inches long and nearly 60 inches wide.


Both gamely modeled by Lisa, the newest team member at The Purple Purl.

Thursday, May 10, 2012

Upcoming Events: Needle Emporium, Shall We Knit

On the road again...

Back to Needle Emporium in Ancaster May 26th! (Julie bought a kettle just for me, she may as well get her money's worth out of it... ) Seriously, it's a great shop, and the "bay area" knitters are wonderful.  By popular request, I'm teaching my Finishing Class, and Continental Knitting.

Here's the thing with Finishing: it can be make or break with a project. It's often said that good finishing is the difference between a project looking home-made and hand-made - and I agree completely. I'm pretty passionate about finishing techniques... They are often given short shrift in the books and pattern instructions. You'll get something like "Sew up." or "Assemble." which isn't much help if you're not confident about how.  And many knitters avoid seamed projects entirely for this reason. But seaming is fun and easy and wonderful if you're doing it right. (See this blog post on one type of seam and how amazingly wonderful it is.)  And seams can add to the garment - they provide structure to stop it stretching, and can help you create a better fitting and better looking garment.

And if I may be so bold - you know me, I can be pretty bold - many knitters who think they know how to finish don't know everything they need. If you're seaming knits with the right sides help together like you do for fabric, I can tell you right now you're doing it wrong.

And even if your project doesn't need sewing up, there's things to learn. Weaving in ends.  Joining new yarn when working a project so that they're easy to weave in and hide. Casting off loosely and tidily. (Indeed, casting on well is important in finishing and we talk about that, too.) Oh, and that blocking thing? I explain that and make it easy-peasy! Even if you don't think you need this class, I promise you will learn something!

As for Continental: this class is a hoot! Skip your yoga class and come and stretch and exercise a little with me. It's pretty low impact (just your hands), but like yoga, it can be pretty life-changing. Expand your knitting repertoire a little, add some speed, pick up the skills you need to be a happy Fair Isle knitter. Learn to love seed stitch! And for knitters who are experiencing wrist pain or arthritis, learning to knit continental style helps you manage the strain and keep both your wrists limber and relaxed, without undue stress on them.

More details on both classes here.


And I'll be in Waterloo June 9th and 10th. For World-Wide Knit in Public Day Saturday June 9th, ll be on the front porch of Shall We Knit, knitting. In public. Chances are I'll also be drinking coffee. (The coffee is very good there.) And maybe even some other fun stuff, too.  You never know what shenanigans the SWK girls can get up to... Come, hang out and knit with us, and enjoy the shenanigans.

On the 10th, I've got two classes - Continental (see above), and my Herringbone Shawl.

My Herringbone Lace Shawl is an ideal first lace project, it introduces you to safe, easy and fun lace knitting. I teach you about the magical top-down shawl works. And it's great way to use up those single skeins of sock yarn....

Monday, May 07, 2012

KnitLab San Mateo

I am absolutely thrilled and honoured to announce that I'm on the teaching roster at Knit Lab in San Mateo California this coming November.

The workshop list is amazing - and there's little old me, right in the thick of it.

I'm teaching a full-day "Design Your Own Fair Isle Wristwarmers" session, which is an ideal introduction to colorwork. I provide an introduction to the methods and techniques of Fair Isle, and we create customized, personal, unique wristwarmers using classic Shetland patterning.

I'm teaching my "Two Socks War & Peace Method"... one inside the other.  You know, the Sock Knitter's Party Trick. Bored of making socks the usual way? Looking for a way to show off to your jaded friends? This never fails to impress - and teach you some important things about sock knitting along the way...

and my classic "Designing Custom-Fit Socks" - because 'one size fits all' never does. Learn how to create top-down and toe-up socks for any yarn, for any foot, no matter what the fit challenge. Skinny ankles? Easy! Not-so-skinny ankles? Even easier! High arches? Low arches? Odd feet? Funny toes? We can deal with it all!

Registration opens May 8th.

More info here.

Sunday, May 06, 2012

Chart Reading Tutorial

I've heard from a few knitters that they're hesitant about knitting the Doctor Who shawl because of the charts. It occurs to me that this might be a good time for a small chart reading tutorial.

Some pattern stitches are charted – lace and cables, most commonly. Charts are simply another way of representing a stitch pattern, nothing more. Any written instructions can be represented in a chart, any chart can be written out. As to which you prefer, it’s not about your talent or experience as a knitter, or your level of intelligence – it’s all about your learning style. Visual learners or those who are good at pattern recognition tend to prefer charts; auditory learners tend to prefer written instructions. One isn’t better or more proper than the other, they are just different.

Sometimes you’ll get both in a pattern, sometimes, only one. And often, the one that the pattern uses is a reflection of which one the designer herself prefers – nothing more! (It's also true that charts are easier to check than written instructions, and can take up less space.)


First things first, locate the legend. That’s the key – pun intended. Every chart will have a legend – whether on the same page, or at the end of the book or magazine. Always make sure you find it – not all symbols are standardized. Don’t worry, though, you’ll never have to guess.

Look at the numbers at the bottom – that tells you that this is worked over 7 stitches. And the numbers on the sides are the row numbers – there are 16 rows in total.
The row numbers are the clues to how the chart is read. Row 1, which is a RS row, is read from right to left. All RS rows are read from right to left. Row 2 (and all following even-numbered rows ) are WS rows, and they are read from left to right.

Think about a row of 7 stitches. You knit them in order: stitch 1, 2, 3, 4, 5, 6, 7. When you turn around to work back, you start with stitch 7, and work back to stitch 1. So charts are read in the direction you knit - from right to left on the RS rows and from left to right (stitches 7, 6, 5, 4, 3, 2, 1) on the WS rows.

Let’s take a look at the Legend. The last three symbols are easy, but there’s something funny going on with the first two. A blank square  has two definitions: knit on the RS and purl on the WS.

Row 1 is a RS row, so it goes like this: P1, ssk, k3, yo, p1.
Row 2 is a WS row, so it goes like this: K1, p5, k1.

Why change the meaning? It’s because a chart is a picture of the front (the right side) of your knitting. Really, a blank square  means “do whatever you need to do so that the stitch shows as a knit on the RS”. And a knit on the RS is a purl on the WS. And the dot also has two definitions - purl on the RS and knit on the Ws - really just "do whatever you need to do so the stitch shows as a purl on the RS."

The other three symbols only have one definition since they are only worked on the RS.

This way, you can easily look at your knitting and compare it with the chart, and you’ll see they have a certain resemblance.

Some charts only show the RS rows – the row numbers will be the clue here: if a chart only has rows 1, 3, 5, ... and so forth. Look for some text near the chart -- or in the instructions where it first mentions the chart -- that describes what to do on the WS rows. This is sometimes done to make the charts smaller and easier to read – and you can assume that the WS rows are all going to be the same; in this case, it's most likely just a plain purl row. (In the case of Bigger on the Inside, there are some increased worked on the WS, so they need to be shown.)

For a project worked in the round, every row of the chart is read from right to left, because that's the direction in which you knit. And the symbols will never change meaning! After all, when you're working in the round, you're always on the RS, so that's how you read the chart - always on the RS.

No matter which you are more comfortable with, chances are you’re going to encounter a pattern that doesn’t have the one you like. If you find you prefer written instructions, feel free to write the rows out before you begin; if you prefer charts, you may want to draw charts for the written instructions. Use whichever you find easiest.

Now, for Bigger on the Inside, we've added something else - red boxes! These are repeat boxes.


On every 4th row (4, 8, 12, 16, 20, 24), a WS row, there's an increase. Which means that the number of sts increases. You can see this: the chart gets wider. The first time through the chart, work it exactly as written, ignore the red lines. After you're worked the 24 rows, you keep working them again and again (until you have 52 sts, specifically)... but you've got more stitches. 6 more, in fact. Enough to work the pattern in the red box once more. So the second time you work through the chart - rows 25-48, you start the chart as written, work the 6 stitches in the red box twice (until 2 sts are left in the row), and then finish with those 2 sts. And so forth.

And with the Decrease chart, you're taking away a repeat of the red box every 24 rows.


Excerpted and adapted from "Beyond Knit & Purl". If you liked this, find much more like it in my book!

Saturday, May 05, 2012

Friday, May 04, 2012

Recycling: Conference Badge Holders

As a refugee from the tech industry, I have had more than my share of conference badges - you know, those  little plastic pockets that hang around your neck, holding a card with your name and company affiliation.

Hubby gets them too, at the various film festival he attends.

A  couple of years ago I was working on a lace project, and I needed a way to carry around a small chart, to keep it protected. A full letter-sized sheet protector would have been overkill - and they don't fit neatly into my knitting bag.

I had a brainwave: I could keep the relevant portion of my chart in a conference badge holder. They're clear, they're plastic (i.e. impervious to coffee spills), and they're small enough to fit in a little knitting bag.  Perfect.

I use them all the time.


Tuesday, May 01, 2012

On Gremlins & Errata, or: Stuff Happens

The term "gremlins", used to describe michievous imps that sabotage or cause damage, dates back to the 1920s. It was first used by Royal Airforce pilots, describing mythological figures that were sabotaging aircraft. Otherwise inexplicable mechanical problems with aircraft were blamed on the gremlins.

There are gremlins in all industries, in all lines of work.  Even in knitting.

I like to imagine that it's yarn gremlins sneaking about mills at night with a pair of scissors, snipping the odd strand in a skein and tying them back together, that cause those pesky knots you find once in a while.  (The gremlins at the Noro factory are particularly clever, not just snipping a strand, but rearranging colors in the skeins.)

And there are well-known gremlins in publishing. Gremlins can be damaging or hurtful - or in my case, just frustrating.

Gremlins have been at my book. We had a few photo captions go missing, and a couple of headings shift around.

But we also had a few other things go wrong, and although I'd love to blame it on mythical pixies, it was definitely human error. If you bought the digital version of the book, you should have received a link to the new version in Ravelry. If you haven't, email me at kate at wisehildaknits dot com and I'll make sure we get it to you.

And if you bought the physical edition, download the errata sheet here. In one of those good news/bad news sorts of stories, the first print run has sold out, and so the new edition going to print has all the corrections and tweaks.

Sadly, some of the same pixie- and/or human-attributable errors crept into Bigger on the Inside, too. We corrected them as soon as we found them, but please do make sure you get the latest version.

As a tech editor, I find this sort of thing totally mortifying... if I spend half of my time checking other patterns for correctness, it seems doubly awful that my patterns have mistakes in them. But yes, as a wise man once said "sh*t happens". This is the great thing about the internet, that we can distribute corrections broadly and quickly. And I am grateful for that.

It's hardest of all to check your own work, I know that. But that's no excuse. I am working every day to get better at checking my own work. I appreciate knitters' patience as we make things right.