Thursday, March 31, 2011

Advanced Lace Knitting Class

I've taught a Lace 101 class for years, and it's a lot of fun. It's for knitters of all experience levels who are looking to tackle lace for the first time.

I cover not only how to work lace, but how lace works - the relationship between the yarnovers and all the different decreases. I teach how to read lace patterns, both written and charted.

And I spend some time on preventing mistakes - through the use of a lifeline, through counting tricks, and through pattern management. In four hours, knitters learn enough to confidently tackle their first (few) lace projects.

For almost as long as I've been teaching this class, I've been getting requests for a follow-up: Lace 102.

I've finally put this class together, and I'm teaching it at The Purple Purl in May.

As part of this class, I've had fun developing a sampler out of a variety of nefarious and challenging lace patterns:

From top down:
An applied edging - causes lots of confusion and consternation.

A Gardenia pattern with patterning on both sides, and tricky decreases.

A lace ladder - double yarnovers.

An embossed leaf because I love the pattern, and it also has a wildly variable number of stitches.

A Fountain stitch, with delayed decreases.

A Shetland Fern, with patterning on both sides, and faggotting.

A classic faggotting stitch, patterned on both sides, with stacked decrease and yarnovers.

An Estonian butterfly with nupps. (It's pronounced to rhyme with soup.) Because Nupps are messy and difficult.

And traditional Shetland Razor Shell pattern with my favourite decrease: s2kpo. An opportunity to discuss all types of double decreases, and to discuss marker management.

We'll also practice unravelling lace, and fixing mistakes - yes, you can add in a missed yarnover, or a missed decrease, or even correct the direction of a decrease.

The class runs over two sessions, so we can learn some new skills and gets lots of practice. You'll also have an opportunity to get you started on a new lace project. We'll even cover the provisional cast-on for lace, if you want.

So whether you've got a particular project in mind or not, this class is an excellent way to expand your lace knitting skills, and learn some new tricks.

Tuesday, March 29, 2011

Project Black Sock: Update 2

The cotton pair are done, and I've got three more on the needles - the Koigu, being worked two at a time, and the Regia 4-ply on dpns.

Pictures at the Knittyblog.

I am being seriously distracted by the Lanesplitter skirt, though. I am a skirt wearer, and I do love Noro. I believe I may have committed to knitting one...

Friday, March 25, 2011

Further on the SSK: BRILLIANT Tip from Cat Bordhi

Yes, ok, the abbreviation may leave something to be desired, but it is a decrease I love and use often.

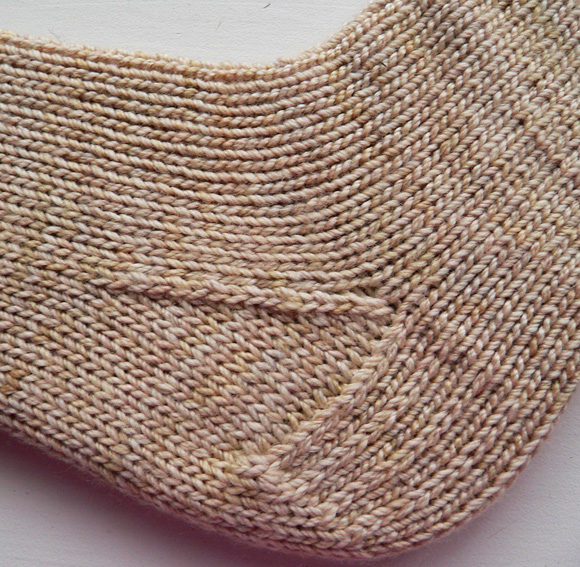
I first encountered it in sock knitting, as part of the gusset decrease.

I was working on a pair of socks just the other day (black socks, naturally), and I remembered the clever trick I learned from Cat Bordhi...

If you're working a vertical line of ssk decreases with even rows/rounds in between, the line can look wobbly... to combat that, knit the stitch immediately above through the back loop. (Mentioned in the Gusset section of this pattern.)

Tidies things up very nicely!

Tuesday, March 22, 2011

SSK: Worst Abbreviation Ever?

TracyKM made an excellent comment on my recent post about ribbing... she mentions that she ran into a similar issue with SSK...

The pattern she was working with defined the SSK decrease as "slip, slip, knit". So she slipped a stitch, slipped a second stitch, and then knitted a third.

(Which is, by the way, absolutely not the way it's done. Not even close. If you're not familiar with SSK, go here now.)

I see this reasonably often, and it can get a knitter into serious trouble... after all, not only is that NOT a decrease, but it also uses up one more stitch than it should, and it can completely screw up with your stitch count.

I regularly get asked what SSK stands for, and after years of teaching knitting, I have simply stopped spelling the abbreviation out. I respond with a definition: "it's a left leaning decrease", if I'm feeling theoretical, or, if I'm feeling effusive, "it's a k2tog but you twist the stitches first".

Invariably, someone in the room pipes up and says "slip, slip, knit". I try to make a little joke out of it, and explain why it's so horribly wrong.

I mean, technically, it stands for "slip, slip, knit the 2 stitches together through the back loop", but it so rarely gets spelled out that way. Yeah, sure, if you know what you're doing, then "slip, slip, knit" conveys it - but after all, aren't instructions like these for people who don't know what they are doing??

I really do need to come up with a catchy alternative explanation - in the meantime, I will simply continue to refer to SSK as a candidate for the most misleading abbreviation ever, and hope that knitters remember how to work it.

Monday, March 21, 2011

Project Black Sock: Update 1

Having gone public with Project Black Sock (a.k.a. the Sock Drawer Project) on this blog and on the KnittyBlog, I figured I should give some updates.

Currently on the needles:
Fortissima Cotton - on the left, second sock halfway done; on dpns, one at a time
Koigu - yes, really! I found some black Koigu! Two at the same time, on two circulars, just pass the cuff on both.


Yarns lined up, in no particular order:
2 skeins Berroco Ultra Alpaca Fine
Paton's Kroy
KnitPicks Stroll
Regia plain black
Briggs & Little Durasport
Regia Galaxy in a grey mix
And there's the Indigodragonfly TARDIS colourway which isn't black, but will definitely make an awesome but classic dark sock.

Thursday, March 10, 2011

Things We Take for Granted: Ribbing

My Project Class often attracts new knitters. And I love them.

My Project Class is a multi-week guided workshop. The idea is that knitters bring a project that is a personal challenge, and I equip them with the skills and knowledge to complete it.

I see a broad range of experience and skills levels in the class. We see seasoned knitters looking to stretch themselves and tackle something they've never tried before, like lace or socks. We get new knitters fresh from beginner classes looking to try an actual project. And there are always self-taught knitters (thanks to the internet!) who have made a million scarves and need something more exciting.

I love this environment - lots of different projects on the go, lots of different skills levels. The more experienced knitters provide encouragement and share skills with the newer knitters, and the newer knitters bring a level of excitement and enthusiasm for their new passion that the more experienced knitters often find inspiring.

Teaching the class is inspiring to me, too. I get to vicariously enjoy the projects my students make, and it never ceases to thrill me to see a student's pride and amazement in her (or his) own work.

I, too, learn lots from the class. I get to see and read a lot of patterns, and I believe it's made me a better writer of patterns and technical editor. I see what sorts of instructions make sense and are clear, and what sorts of instructions create more questions than they answer. (I have been known to get cranky about a pattern - I get frustrated on behalf of all knitters when I see a poorly-written pattern. If a pattern isn't well written, a knitter is less likely to be successful and enjoy the process. And an unsuccessful knitter is an unhappy knitter, and an unhappy knitter is very likely become a non-knitter. And this makes me sad.)

And I learn from knitters what's easy, and what's not.

In a recent project class, I had a student who we shall call Daphne. Daphne had taken a beginner level class, and was feeling very confident about knitting and purling, and had chosen a great starter-level project: a headband worked in (k2, p2) ribbing. Easy, right?

Poor Daphne was completely at sea.

The instructions were fine: Row 1 [RS]: *K2, p2; rep from * to end of row.

But she couldn't figure out why she had so many stitches at the end of a row, and that everything looked so very tangled up.

I laughed when she showed me... in sympathy and recognition. I remember this so very well.... in my case it was (k1, p1) ribbing.

Oh yeah, very easy... knit a stitch or two, purl a stitch or two. But nowhere in the instructions do they tell you that you have to MOVE THE DAMN YARN.

She's on the right track now.

Tuesday, March 01, 2011

Design Your Own Fair Isle Wristwarmer Workshop

Last weekend I was honoured to host a workshop for the Kitchener Waterloo Knitters' Guild.


2011 is the year of colourwork for the KW Guild, and the topic of my workshop was Fair Isle. In the workshop, we learnt some things about Fair Isle designs and the history of the technique.


We practiced techniques for knitting with two colours - one-handed and two-handed.


And we spent the afternoon designing our own Fair Isle wristwarmer patterns!


I had a ton of fun - and I think the participants had a good time, too.

The participants are posting their progress on Ravelry already, and I love seeing the results.


These are SweetG's mitts-in-progress. More photos on the KW Guild Flickr stream, and in Ravelry.

(All other photos in this post courtesy Suzanne Carter-Jackson.)

Friday, February 25, 2011

Combination Knitting

A couple of weeks ago I posted about Continental Knitting. I've had some great feedback about the Norwegian purl - happy to have helped out some knitters with a new skill.

I've been doing a lot of colourwork recently, and I love the speed I can get by stranding colours with two hands.

When I wrote that post, I mentioned Combination Knitting. I should explain myself, I figure.

It's pretty clear that Norwegian or not, the purl stitch can be cumbersome in Continental knitting.


Some knitters approach it another way - they just wrap the purl stitch the "easy" way.


This results in stitches that are oriented the "wrong" way on your needle. Normally, the right leg of the stitch is at the front of the needle. The result of an "incorrect" purl wrap is that the left leg of the stitch is at the front of the needle. You can see this on the following right side row...


If, on the following row, you were to knit this normally - through the front loop - the resulting stitch would be twisted. Twisted stitches are generally undesirable, as they look different, and they tend to tighten up your knitting. (There are times that twisted stitches are used for effect - often in a twisted ribbing, which is tidy and tight and has a terrific corded look.)

How to compensate for mis-oriented stitches? Knit them through the back loop!


Seriously! It's that easy!

That's Combination Knitting.

Now - some caveats. It's most appropriate for stocking stitch worked flat. For garter stitch, or stocking stitch in the round, you're only knitting, therefore only wrapping the usual way, so the stitches end up oriented the usual way and so you will need to work them the usual way.

In addition, when working Combination style, because your stitches are oriented the other way on the knit side, you need to compensate in your decreases: for a "normal" Western knitter, k2tog leans to the right, for a Combination knitter, k2tog leans to the left. In many situations this doesn't matter, but in applications like lace, it can make an unholy mess.

A skilled combination knitter knows that when there's a k2tog in the pattern, you need to work an ssk, and when there's an ssk called for, you need to work a k2tog.

The name refers to the fact that it's a combination of the standard Western way of knitting - the method that most Western Europeans and North Americans learn, and the Eastern Method, common in Far Eastern Europe and the Near/Middle East.

The goddess of Combination Knitting is Annie Modesitt. Learn more at her website.

When worked with the yarn in your left hand, Continental style, the Combination Method is screamingly fast. Annie tells a terrific story about a yarn shop owner accusing her of lying because of the speed with which she finished her first sweater project.

In fact, Ms. Modesitt offers a free online class in the technique - more info here.

Give it a go - you may surprise yourself!

Thursday, February 24, 2011

Spring Creativ Festival: Talks


Are you planning on attending the Spring Creativ Festival in Toronto, running April 15th & 16th?

I'm there on the Friday, giving three free 45 minute knitting talks.

Yarn Knowledge
Mystified by all these terms - double knitting, worsted, aran? Unsure whether fingering is a potato or a yarn? Wondering why you should care about whether a yarn is superwash or not? This session will explain yarn terminology, help you understand yarn substitution and gauge, and make you a more confident yarn shopper and knitter.

Cast Ons & Cast Offs Improve your knitting and expand your knowledge by trying and adding some new cast-ons and cast-offs to your repertoire. See which cast-on is best for different types of projects. Plus, Kate shares tips to help you achieve that elusive loose cast-off.

Fibre Care You’ve spent a lot of time knitting or crocheting your garment, now let’s make sure it stays beautiful forever. Discover how to properly wash and store your finished items, whether wool, cotton or a man-made fibre. Kate Atherley will explain all those strange symbols on the yarn labels, share tips for moth-proofing and show you how proper fibre care can improve the look of the finished items. Samples for everyone courtesy of my good friends at Soak.

That's right - I'm free with admission! And with goodies for all! If you're there, come by and say hello.

Monday, February 21, 2011

Baby Clark with all his Knits


Congrats to E., a student of mine, whose son Clark was born recently. Over the second half of last year, E. attended my project classes, quietly knitting up a storm for the baby-on-the-way.

The bonnet is my Heirloom Bonnet With Ears.
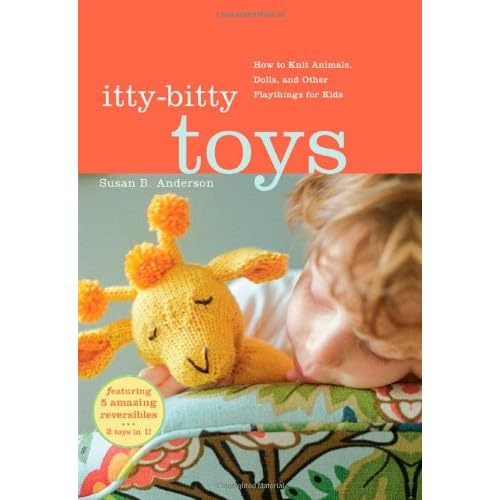
The gorgeous hippo comes from the book Itty-Bitty Toys. This is a seriously great book - all the patterns are adorable, and knitting toys is a great skill-builder for adventurous knitters. There's working in the round, increasing, decreasing and various assembly techniques - all in small, quick-knit, supremely cute projects.

Tuesday, February 15, 2011

The Sock Drawer Project

It's no secret that a) it's cold where I live, b) my feet get cold very easily, and c) I love knitting socks.

A couple of weeks ago I finished a pair of socks made with Berroco Ultra Alpaca Fine.
I've been wearing them as often as possible - hand-washing them at night rather than waiting for the weekly darks load - to test how they wear.

The yarn is a terrific blend - 50% wool, 30% nylon to keep them hardwearing - and this is the important bit - 20% alpaca for warmth. And holy cow, they are indeed very warm. And they're wearing well, too. The yarn has "fuzzed up" a little, but I don't mind.

Because of my cold feet, I layer socks. Between November and March I wear two pairs of socks every day - a thin store-bought pair of black wool socks under a (typically brightly coloured) hand-knit pair. The inner socks are a fine ribbed sock, very much like a men's dress sock, that I found at Simon's in Montreal some years ago. They're absolutely brilliant, and over a few business trips I bought myself 12 pairs. After 8 or 10 years, a couple have gone missing, and the rest are starting to wear out. I put a call into a friend in Montreal, but he wasn't able to find them for me.

(And yes, this means that I buy my winter shoes in a size larger than my summer shoes.)

I was starting to worry about what my sock layering strategy would be... but then I finished this pair. It hadn't occurred to me that I could knit the inner-layer socks, because I wasn't sure I could make them fine enough to fit under another pair. But this yarn is my answer!

The Berroco Ultra Alpaca Fine is indeed quite fine - finer than most other sock yarns I've worked with. I knitted these socks snug (knowing that they'd be very stretchy because of the alpaca content), and they have turned out to be the ideal inner layering sock.

So now I have cooked up a plan.

I'm going to buy up a whole ton of this yarn and knit myself a whole new set of layering socks. Once I've finished up the two brightly coloured pairs currently on my needles, it's nothing but plain black socks for a while. By the time next winter rolls around, I should be ready.

Thursday, February 10, 2011

Found! The Mary Maxim Pattern Book


I've blogged here a couple of times about vintage Mary Maxim sweater patterns. I've been lucky enough to receive copies of original Mary Maxim patterns in collections of old patterns I've been given.

Mary Maxim sweaters are also known as curling sweaters. They are designs based on, inspired by the traditional "Cowichan" sweaters of the Pacific Northwest, big bulky knitted jackets with motifs on the back. Classic motifs include wildlife, hockey players, tractors, that sort of thing. They were hugely popular as both knitting projects and fashion items in the 1950s and 1960s.

There must be a magic combination of Google words that brings people to my site, because at least once a month I get an email asking where to find patterns, or if I'd be willing to sell one of the ones I have.

Not willing to sell one, sorry - but I have a better solution.

Mary Maxim, has recently published a pattern book with a selection of their designs, including the very first one.

If you're looking for a "curling sweater" pattern, this is the book you need.

You can order it here.

Monday, February 07, 2011

What a Great Weekend: New Knitting Friends

I had a terrific time at the DKC Winter Workshops this past weekend. I met some great new knitters and friends - and caught up with some old friends, too.

There's Debbie, who apparently used to crochet in a past life. I teach a class called Crochet For Knitters. It's about teaching knitters how a crochet hook can make their lives better - for picking up stitches, for quick seams, for decorative edgings, for lie-flat edgings, for lengthening sleeves that were inadvertently knitted too short (yes, I'm looking at you, M.). I don't fuss about style, and we don't worry about reading the patterns, it's sort of the crafter's equivalent of a conversational Italian course - just enough to be able to find your way around, but not so much that you're worrying about correct verb forms. Knitters are often clumsy at first with a crochet hook - god knows I was - but Debbie was some sort of savant. Her friends and I just watched her swoop the hook ever-so-elegantly, like she'd done it before.

I met a real live natural Norwegian Purler - that is, someone who was taught that way and didn't know there was any other way. Her name is Sue, and she learnt to knit in Denmark. I think I startled her when I realized how she was knitting and rushed over to watch. I had to reassure her that what she was doing was actually very cool. She said that she had noticed that no-one else did it the same way in North America. I told her that she should be proud of her method, and should offer to teach it to anyone who remarks upon her knitting. So - look out for a lovely lady called Sue who purls Norwegian style - she may well teach you!

And there's Liz who took my "Lace 102" class so she could tackle a Shetland lace pattern from Heirloom Knitting. Specifically, a multi-pattern, multi-bordered cob-web weight Shetland lace shawl that can be worked as either a triangle or square. The triangle requires 6 x 25gm of 1 ply lace weight. 25gm of this yarn has 350m of yarn. I got out my calculator (since being good at math is not nearly the same thing as being good at arithmetic), and worked it out: that's 2100m of yarn. Cobweight weight yarn. FOR THE HALF SIZE VERSION.

The full size version takes twice that.

Liz has the right attitude - she's set herself a 5 year goal. I plan to take her out for a drink when it's done.

Thursday, January 27, 2011

A Scarf for Spring: Sekku Herringbone

I have a mild obsession with the Noro yarns -I love the way they combine colour. A successful Noro design keeps the stitchwork simple and lets the colours show off. This classic and simple lace pattern causes the rows to scallop, making lovely wavy stripes.

This scarf uses one ball of Noro's Sekku laceweight, a rather lovely blend of wool, cotton and silk. It's got a cool cotton-y hand, but the wool and silk make it warm and ensure it handles a lace pattern stitch well.

This is a terrific project to try out lace - only one pattern row, with a straightforward 12-stitch repeat. And I've written the pattern with lots of extra detail to help out newer knitters.

Don't be afraid of the fineness of the yarn and needles - this is really no more work than a pair of socks, and much easier to show off.

It would also work very well with one skein of the new Kirimeiki laceweight or any of the Noro sock yarns - Kureyon, Silk Garden or Taiyo. For those yarns, use a 3mm needle for the knitting and a 4mm needle for casting off.

The finished Sekku scarf is approximately 28 cm/11 inches wide x 127 cm/50 inches long after blocking. A thicker yarn would provide a bigger scarf, of course.

Buy the pattern now on Patternfish and Ravelry.

Thanks to Natalie for the excellent photography!


Monday, January 24, 2011

More Upcoming Classes: Fair Isle Workshop for KW Guild

I'm on the road again in February, off to Kitchener to teach at the Kitchener Waterloo Guild's February workshop.

I'm teaching a full day class, February 26th, "The Fair Isle Bootcamp".

This class will teach you everything you need to know to be a confident Fair Isle knitter. Through practice swatches, you’ll master reading the patterns and charts, and working with multiple colours - both one-handed and two-handed methods, both in-the-round and flat. In the second half of the class, you’ll be provided with the motifs and pattern to create your own pair of custom fingerless mitts. Upon registration, students will be provided with a materials list for swatching; a materials kit to make the fingerless mitts will be supplied at the class and is included in the cost of registration.

To give a taste of what we'll be working on, my Fair Isle sampler mitten is in the photo at left.

Registration is only open to Guild members until February 1st, but you can enquire about availability and get on the list by emailing KWKGworkshops at gmail dot com, attention Lynne Sosnowski.

More info here and in the newsletter here.

The event is being held at the Laurentian Centre Zehr’s store, 750 Ottawa Street South (Ottawa at Alpine), Kitchener, 9:30am to 3:30pm and the cost to register is $75 for members/$90 for non-members.

Upcoming Classes: DKC Winter Workshop

I'm again honoured to be teaching at the DKC Winter Workshops, being held February 5th and 6th at Metro Hall in Toronto.

I'm teaching the following classes:

Cables 101 - suitable for newer knitters who are looking to tackle cables. I cover both written and charted instructions.
Cabling without a Cable Needle - speed up your cable knitting and expand your skills. Suitable for knitters who have a little experience with cable knitting.
Lace 101 - suitable for newer knitters who are looking to tackle lace. I cover both written and charted instructions, and share tips for making lace knitting easier and more fun.
Next Steps in Lace Knitting - for knitters who have worked one or two lace patterns, I provide more insight into addressing mistakes, discuss more complex patterns like two-sided lace, and focus on building your confidence and your skills.
Design Your Own Custom-Fit Socks - Toe up, or top-down, design a sock that fits you precisely! We'll talk about special fits like wider or narrow ankles; odd feet and knee socks.
Crochet for Knitters - Crochet is an excellent skill to have for a knitter - pick up dropped stitches, create decorative and functional edgings, and work very fast seams. Suitable for all levels of knitters who don't know how to crochet.

Full schedule and registration information here.

Thursday, January 20, 2011

Expanding My Own Skills; Giving Yourself Permission to Be Awful

The Harlot posted recently about the process of learning, and how we forget that we have to be bad at something before we can get good at it.

I see this all the time in my knitting classes; as adults we expect, I think, that we'll be proficient at everything right from the get-go. I see knitters get frustrated with themselves because they don't get something straight away; I see knitters angry with their work because it doesn't look like the work on my needles, or the samples in the shop.

It's easy to be patient with my students, because I know it's going to get better. I explain, first of all, that everything looks better if you give it a wash (it does! really! next time you knit two of something - socks, mittens, sleeves - wash one and not the other and compare). And I explain that everyone's first efforts were fairly dreadful.

I really wish I'd kept my earliest attempts at knitting, to show off in my classes. They'd be great for comedy value, but also to reassure knitters that they're doing very well!

There was that purple cotton cardigan... oh dear... And those first socks, those red worsted weight socks. And I can remember so very clearly asking the very patient woman at my then-LYS how on earth you were supposed to know what size the hat was going to be when it was done.

(This hat, BTW. It turned out to be the perfect size.)

I've been expanding my own skills of late, challenging myself to learn techniques outside my comfort level. And as is always the way, we are hardest on ourselves. When ripping out the swatch for the fourth time, cursing loud enough to wake the dog, I realized that maybe I shouldn't be so hard on myself... and that maybe I should take a lesson from myself.

Sunday, January 09, 2011

Continental Knitting; the Norwegian Purl

I taught a couple of classes on Continental knitting this past weekend in New Hamburg. Now, some may question my qualifications to knit such a classes, since by default I knit English-style - that is, with my yarn in my right hand. I learnt that way, when I was very young, and I find that although it might not be the fastest method, it's very comfortable for me.

But that doesn't mean I don't use and enjoy the Continental method when it suits me. I'm all about having options!

Continental knitting has you hold your yarn in your left hand, like so:


English-style knitters, like me, usually find the Continental knit stitch easy to manage - it's easy to work, and the benefits are immediate and obvious.

Because the working yarn is stretched behind your needles, it's pretty easy to "pick" the stitch. Like so:


Just put the right-hand needle into the stitch, and swing the tip of the needle over top of the working yarn to the right, and bring the working yarn back through the stitch. Easy!

It's much more efficient in movement, since you're not moving the yarn at all, and barely moving the needles.

I like to use the continental knit when I'm working a piece entirely in garter stitch, or when my hands are tired.

My gauge is quite different between the English and Continental methods, however, so I have to be consistent about which method I'm using in a project. This is true for many knitters - continental knitting is often looser than English knitter.

I must confess, however, that although I could (and would) do it, until recently I'd never really been fluid with the Continental purl.

No matter what method they learn, it seems that a lot of newer knitters dislike purling - they find it cumbersome and sort of unnatural. (They're not wrong; there is a theory among knitting historians that knitting in the round was invented first, and then the purl was a later adaptation to make it work flat.) A purl seems fiddly in English knitting, but downright unpleasant in Continental knitting. It's the pesky wrap.

What you save in movement in a Continental knit seems to get spent in the purl, trying to man-handle the yarn over the needle point and make it stay still while you move the needles.

There are a couple of common ways of wrapping the yarn for the Continental purl.

With your index (or middle) finger:


Or with your thumb (less "traditional", but I find this easier - I can pivot my thumb and let my fingers worry about holding the needles):


These work well, but don't feel elegant to me.

And then there's the Norwegian purl. I did some experimenting with it and reading about it before I taught the New Hamburg class, and I think it's changed my life.

In essence, instead of moving the yarn to work the purl, you move the needle. It's much closer to the method you use for the Continental knit stitch, in fact.

It goes like this...

Leave the yarn at the back (Yes, pause to think about that. No moving the yarn at all. Imagine how easy ribbing could be!) and put the needle into the stitch as normal for purling (that is, from back to front)...


And, leaving the yarn in place, move the tip of the right hand needle around the working yarn (as you do for a knit; think on that, too - makes it very easy and familiar)....


Then once the yarn is wrapped around the needle like this:


push the wrapped needle back through the stitch (from front back through to the back), like this:


For some knitters, it's a world-changer. I know it was for me. If you've been struggling with a Continental purl, try it.

Some knitters do still find it easier if you bring the yarn to the front, but still use the same basic technique.

You can read more about it, and see more pictures here and here on the blog of Knitty's Teresa.

Play with it and see how it works for you. Let me know how it goes!

Tuesday, January 04, 2011

A Return to Shall We Knit: Two Socks, and Continental Knitting

I'm off to Shall We Knit again this coming weekend, Jan 8 & 9, for two new classes. (It looks like the weather will be ok, but we have scheduled a snow date, just in cast Mother Nature decides to have some fun with us.)

Two Socks at the Same Time. The Normal Way, on Magic Loop. Like this:


And Continental Knitting. Speed up your knitting by learning a new technique!

Details here.

Saturday, January 01, 2011

Looking forward to 2011

Here and at the KnittyBlog, I've written some thoughts about 2010.

(You do read the KnittyBlog, don't you? You should. I write there at least once a week.)

But what of 2011? Things I'm looking forward to in this new year...
  • my name in a number of publications (and on the front cover of one of them, I hope)
  • experimenting with more colourwork
  • teaching further afield (Starting with Shall We Knit again next week! Yay! Two-socks at once on magic loop, and continental knitting, if you're wondering.)
  • spinning
  • knitting with wire
  • more crochet; I started a crochet shawl about 6 months ago, and I really would like to finish the damn thing
And my number one hope for 2011 is....
  • teaching the dog to stop playing with my yarn.