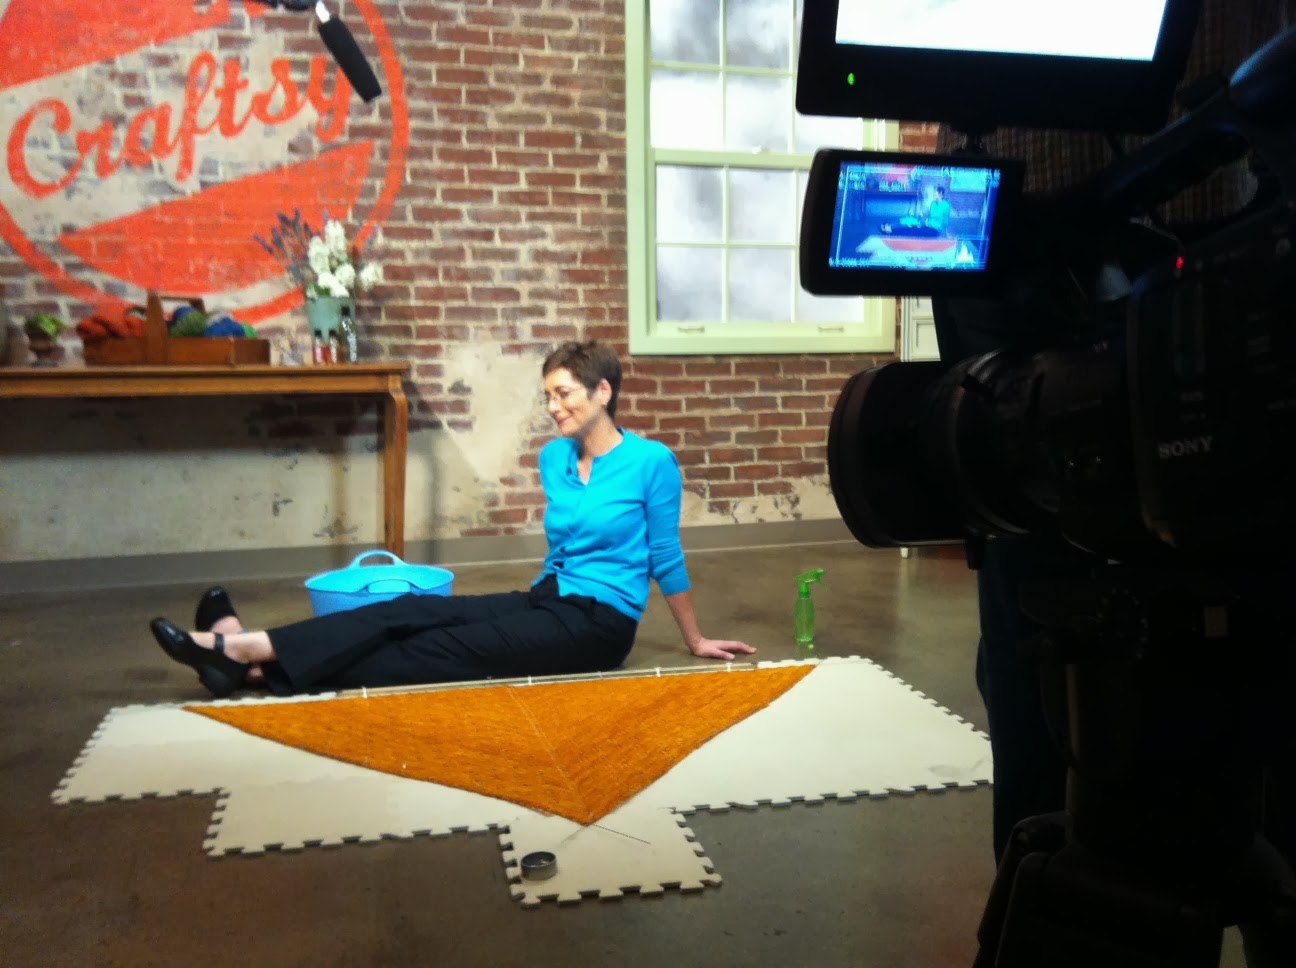
Do you like my new designs? I love them all, but I'm particularly proud of the shawl.
If you do decide to make the lace shawl, you would need to block it.
Like this:
(This is the Rickenbacker, in Waterloo Wools' Huron Fingering, in the Highlighter colorway.)
And if you're not sure about blocking, I can help you with that! I have a class!
My Craftsy class launched just a few weeks ago, and the response has been most excellent.
As a way of saying thank you, Craftsy and I are offering another free class giveaway. Enter here.
Sign up for Craftsy, or use your existing account to enter the contest. One entry per person. (If you're having rouble seeing the giveaway page, using Firefox should help.) Contest ends midnight EST Monday November 4th.
Remember, Craftsy classes make great gifts, too... As a special offer, since you might want to know how to block these new projects, here's a link for a 50% discount valid until midnight EST Monday the 4th, also.
Saturday, October 26, 2013
Friday, October 25, 2013
Announcing: The Rock & Roll Collection
It's a well-known fact that I wear a lot of black. It's a holdover from my 'punk rock girl' phase. In my defense, it also makes it easy to get dressed in the morning - no decisions! everything matches! coffee stains don't show!
It's also a well-known fact that I like knitting in black. It's boring to look at, very difficult to photograph, and my optometrist doesn't like me doing it, but I love the results.
It's also pretty well known that I'm a big fan of the yarns of indigodragonfly. And she has a series of shaded black colorways, her "High Fidelity" series, named after quotes from a most excellent music movie.
It seemed like fate, really.
I'm thrilled to announce my The Rock 'n' Roll collection (feat. indigodragonfly)! Kim and I are launching it this weekend, at KnitCity in Vancouver: .
Rickenbacker, a slightly off-center triangle shawl worked in a single skein of fingering weight yarn:
Hofner lace socks:
Gibson cabled fingerless mitts in fingering weight:
And the Fender hat, in worsted weight:
Each of these is designed specifically to be simple and fun to knit in dark colors, and each is slightly off-kilter in some way: the socks and mitts have lefts and rights with mirrored patterning The shawl is mildly asymmetrical, and the hat... oh, the hat... it looks like an innocent ribbed watchcap, but it holds a secret: the ribbing is an irregular repeat. Some k1s, some k2s, some k3s, some p1, some p2s, some p3s, maybe even a p4.
You could knit them in colors, and they'd be fun and not-too-challenging projects. But if you've always wanted to knit rock and roll style, this could be your answer.
As is my way, the hats, mitts and socks come in multiple sizes, and the sock and mitts patterns are written to be worked on any method: DPNs, magic loop or two circulars.
You can buy the entire collection for $12, on Ravelry or Patternfish, or the individual patterns for $5 each - Ravelry links: shawl, socks, mitts and hat; Patternfish links: shawl, socks, mitts and hat. (Print copies of the patterns are available for $7 each or $15 for the collection at KnitCity, and look for them at a couple of key stores in the near future.)
Major kudos and thanks to the artists that helped make this idea happen: Kim for her yarns, Lauren Ogilvie for her photography, and Zabet Stewart for the graphic design. They got what I wanted and ran with it. And then thanks to Ruth Garcia-Alcantud, who kept me on the straight and narrow, technically.
I'm honoured to work with such a great team.
Thursday, October 24, 2013
Wednesday, October 23, 2013
Tuesday, October 22, 2013
I Don't Know About the Men in Your Life, but the Men in My Life Don't Like Their Handknits to be "Fancy"
Or is it?....
Monday, October 21, 2013
Saturday, October 19, 2013
A Conversation with Lauren, a Photographer
"So, you're telling me that you need me to photograph a collection of items entirely in black?"
"Yes."
Friday, October 18, 2013
A Conversation with Yarn-dyer Kim
"Hey Kim... you have a range of shaded black yarns, yeah?"
"Yeah... why... ?"
"I have an idea."
"Does your optometrist approve?"
"Probably not."
"Will that stop you?"
"Nope."
"Ok. Let me know how many skeins you want."
To be continued...
"Yeah... why... ?"
"I have an idea."
"Does your optometrist approve?"
"Probably not."
"Will that stop you?"
"Nope."
"Ok. Let me know how many skeins you want."
To be continued...
Wednesday, October 16, 2013
New (Old) Sock Pattern: the Gansey Sock
This is a sock I designed years ago (in the spring of 2009,) for a now-defunct magazine. I've always loved it, and it's time to bring it back to life.
Traditional gansey pattern stitches make for an attractive, interesting to knit, but not too challenging sock pattern. Suitable for both men and women, in finished sizes Adult XS to XL (foot circumference 7 to 8.5 inches).
I do love the traditional patterning of a gansey, but I'm not always looking for a full sweater project.
This sock design takes a number of key gansey design elements. The patterning is often confined to the yoke area: to conserve yarn, to improve the fit, to make it a bit warmer, and to make future patching as simple as possible. Plain fabric uses less yarn than patterned areas, of course. The patterning improves the fit of the sweater in the yoke area by tightening up the fabric and making it a bit denser , warmer and harder-wearing. And future patching in key areas of wear - the lower parts of the body and the sleeves - is easy because they're worked plain which makes them easy to darn or reknit. And since these sweaters are designed to last, you can also make alterations - lengthening the sleeves for another wearer, for example, by unravelling and just knitting a bit further. And so with the sock, I've left plain the areas that are likely to wear out - the toe and lower part of heel. I have left the patterning on the back of the heel so that it will wear a bit better; pattern stitches are as good as heel stitch in this context. And I've the pattern stitches on the leg keep it nice and snug so it stays up.
I've used a classic regional combination of patterns - a typical Filey cables-and-steps combo. The designs were often very regional, handed down from knitter to knitter verbally, and didn't travel very far, so I stuck with a single region's patterning. I liked the "steps" pattern, since socks are for walking, after all. The reverse stocking stitch ridges are traditionally used to provide some definition to the patterning - I've used them here also as a convenient place to fudge the stitch numbers so that I was able to have my (k2, p2) ribbing with seam work out nicely, independent of the number of stitches required for the patterned area.
Although they're worked in the round, Ganseys often have faux-seams in seed or reverse stocking stitch, which flow up into the classic underarm gusset. The underarm gusset is there to improve the fit of what should otherwise be a fairly snug sweater - as with the gusset of a band-heel, top down sock. I replicated a seam which runs down both sides of the sock and splits - just as with an underarm gusset - to run down the side of the heel and the foot, all the way to the toe.
Pattern is written for DPNs, Magic Loop or 2 circulars. Available on Ravelry and Patternfish. (Note: Patternfish link might not yet be active.)
Thanks again to camera-whiz Claude La Rue who shows up my lame photography skills in the best way possible.
Traditional gansey pattern stitches make for an attractive, interesting to knit, but not too challenging sock pattern. Suitable for both men and women, in finished sizes Adult XS to XL (foot circumference 7 to 8.5 inches).
This sock design takes a number of key gansey design elements. The patterning is often confined to the yoke area: to conserve yarn, to improve the fit, to make it a bit warmer, and to make future patching as simple as possible. Plain fabric uses less yarn than patterned areas, of course. The patterning improves the fit of the sweater in the yoke area by tightening up the fabric and making it a bit denser , warmer and harder-wearing. And future patching in key areas of wear - the lower parts of the body and the sleeves - is easy because they're worked plain which makes them easy to darn or reknit. And since these sweaters are designed to last, you can also make alterations - lengthening the sleeves for another wearer, for example, by unravelling and just knitting a bit further. And so with the sock, I've left plain the areas that are likely to wear out - the toe and lower part of heel. I have left the patterning on the back of the heel so that it will wear a bit better; pattern stitches are as good as heel stitch in this context. And I've the pattern stitches on the leg keep it nice and snug so it stays up.
Although they're worked in the round, Ganseys often have faux-seams in seed or reverse stocking stitch, which flow up into the classic underarm gusset. The underarm gusset is there to improve the fit of what should otherwise be a fairly snug sweater - as with the gusset of a band-heel, top down sock. I replicated a seam which runs down both sides of the sock and splits - just as with an underarm gusset - to run down the side of the heel and the foot, all the way to the toe.
Pattern is written for DPNs, Magic Loop or 2 circulars. Available on Ravelry and Patternfish. (Note: Patternfish link might not yet be active.)
Thanks again to camera-whiz Claude La Rue who shows up my lame photography skills in the best way possible.
Sunday, October 13, 2013
Thanksgiving, With Sock
I have very good friends, who don't mind if I knit when I'm at their house for a Thanksgiving dinner.
And then don't even mind when I put my feet on their coffee table...
And an evening's worth of a knitting results in a sock ready for toe decreases.
(We were stopped at a red light when I took this photo; I can't imagine it's safe to do this in a moving car.)
The yarn is Paton's Kroy, col 55614, "Burnished Sierra Stripes". I LOVE THIS YARN. Love how it feels, love how it knits up, love how it wears, and this particular colourway is fantastic. Don't let the fact that it's sold in "chain stores" put you off.
When I say I love how it feels, don't get me wrong: this isn't about softness. It's not luxury-yarn soft, no. It's got a good woolly but not scratchy feel to it, and good density, so it gives great stitch definition. (There's a separate longer discussion here, but softness in sock yarn can often mean fragility.) Think Cascade 220, that sort of feel. This yarn is incredibly hardwearing. If you've not tried it, I recommend it. Although ignore the needle size recommendation on the ball band - go with your usual 2.25/2.5/2.75mm.
Tuesday, October 08, 2013
Math: it really works!
I've been working away on the Highlighter shawl (between commissioned design projects, because a girl's got to make a living)...
I knew I was getting to close to the end last night, and about 9pm, I hit a crossroads.
The way the shawl pattern works is that you have to finish the patterned section on Row 1 of a 10-row pattern. And then there's 6 rows of edging and a bind-off.
I was at Row 1, and there was about 15gms (my digital scale was flickering between 14 and 15) of yarn left. I had to whether I had enough for an additional 10 pattern rows and 6 edging rows plus bind-off, or whether I should just forge ahead with the edging.
So I did what any mathematically inclined knitter would do: I open up a spreadsheet application on my laptop and did some calculations.
I knew the skein was 115gms. I had 15 left, so I'd used 100gm. And I knew how many stitches I'd worked with that 85gms....
The shawl starts with 1 stitch, and increases 1 st every other row. And at that point I had 139 sts.
So I calculated that I had worked 19,321 sts. Yes, really.
Here's how that goes:
I cast on 1 st, and worked 1 row on that 1 st. So that's 2 sts, worked over 2 rows.
I increased to 2 sts, and then worked back over those 2 sts. So that's 4 more, for a total of 6, worked over 4 rows.
I increased to 3 sts, and then worked back over those 3 sts. So that's 6 more, for a total of 10, worked over 6 rows.
I increased to 4 sts, and then worked back over those 4 sts. So that's 8 more, for a total of 18, worked over 8 rows.
You see the pattern?
I had 139 sts, and I'd just finished a right side row. So I'd worked 2 rows at 1 st, 2 rows at 2 sts, 2 rows at 3 sts, 2 rows at 4 sts, .... 2 rows at 138 sts, and then just one row at 139 sts (hadn't yet worked the WS row back). Which is 2 x (1 +2 + 3 + 4 + 5.... 138) + 139.
And that's 19, 321. At 100gms of yarn, that's 193 sts per gm. And I've got 14 or 15gms left, so best case, that's 15 x 193 sts = 2898 sts worth of yarn left, worst case that's 2705 sts.
To work the additional repeat and the edging, I'd need to be able to work
139 + 2 x 140 + 2 x 141 + 2 x 142 + 2 x 143 + 2 x 144 + 145 for the pattern repeat (since the pattern ends after a RS row), and then 6 rows at 144 sts for the 6 edging rows (there are no increases in the edging), and then the bind off. That's 2279 sts for the pattern repeat and edging rows. And then because I need to work a loose BO, let's assume that I need about one and a half times the usual row's worth of yarn for the BO, so that's another 216 sts worth of yarn.
So in total, I needed 2,495 sts worth of yarn. Even with a little bit of rounding error, I figured I could just make it.
I'm a brave? foolhardy? trusting type, so I forged ahead. I weighted the yarn as I went, to track usage, and knitted gamely on.
And then I was done.
Indeed, I just made it. It's closer than I would have liked, but I got there.
Sunday, October 06, 2013
Craftsy Class Winner
There were 40 entries, and I went to random.org to generate a random number between 1 and 40, and was given 34.
The 34th commenter was "cheekyredhead". Thanks everyone for entering! I will be in touch.
As a consolation prize, if you haven't already signed up, here's an offer for 50% off the list price of the class. It's time-limited, expires Wednesday the 9th at midnight.
Friday, October 04, 2013
WIPs: mine, and others'
My so-bright-you-need-shades shawl is coming along brilliantly. Pun intended.
But I didn't. I hadn't told them to, they'd just picked them because they wanted to make them. That's the biggest compliment in the world.
Details on this pattern coming shortly. Patience, my lovelies.
Friday mornings, I teach a regular Project Class at The Purple Purl, in Toronto. It's a group session, where everybody gets to work on a project they find challenging, and I help out. It's fun for me, as I get to vicariously knit a lot of very cool things.
This morning, I was working away on the Highlighter Shawl of Eyeblindingness. I looked around the table, and noticed that two of my students were working away on projects from my books.
Lovely Lady P. is making my double-layer mittens in this most excellent tweedy orange, and she's going to work the lining in a lovely weight laceweight.
And The Divine Ms. M. is making my slouchy hat.
Now, it should be said that they're both great knitters, and wonderful people, and they both listen to my knitting advice. So if I had told them to work these patterns, they would have done.
But I didn't. I hadn't told them to, they'd just picked them because they wanted to make them. That's the biggest compliment in the world.
Monday, September 30, 2013
Announcing: My Craftsy Class! With Contest!
Update! The class is live!
I hinted at this a few weeks ago, but I'm now able to give you the details. In August, I flew to Denver to tape a class with Craftsy. My bag was full of FOs I'd borrowed from friends far and wide... well, finished, but not FINISHED objects.
That's because my class is all about blocking. The whys and the wherefores.
I always get questions about blocking in my classes, and it's a topic I feel pretty passionately about - as a knitter, and as a teacher.
As a knitter, I feel passionately about blocking because I know how wonderful it is. I know that blocking is the key to making your handknits (and crocheted items, too) look truly finished.
Blocking smooths and evens about the fabric. Blocking makes it easier to put items together. Blocking shows off the patterning. Blocking makes the fabric bloom.
As a teacher, I feel passionately about blocking because I know how most knitters don't understand it, and don't feel confident about it.
Knitters hear about mats and wires and pins and get scared. It sounds hard. It's absolutely not, I promise!
My class very much focuses on a pragmatic approach to blocking. I provide easy ways to make your handknits look their best!
I'll show you how you can create amazing results with some water and a towel...
But I do also talk about wires and mats and pins and when you need them, and how easy they actually are to use.
I'm so excited about it, I'm posting now, even though the class doesn't launch until Wednesday. In the meantime, I'm running a contest! Leave a comment here (before midnight EST Saturday the 5th of October) to win a free copy of the class. I'll randomly pick a number to choose a winner. (If you're commenting, make sure you log in so I know who you are, or leave me a clue to your email address, please.)
I hinted at this a few weeks ago, but I'm now able to give you the details. In August, I flew to Denver to tape a class with Craftsy. My bag was full of FOs I'd borrowed from friends far and wide... well, finished, but not FINISHED objects.
That's because my class is all about blocking. The whys and the wherefores.
I always get questions about blocking in my classes, and it's a topic I feel pretty passionately about - as a knitter, and as a teacher.
As a knitter, I feel passionately about blocking because I know how wonderful it is. I know that blocking is the key to making your handknits (and crocheted items, too) look truly finished.
Blocking smooths and evens about the fabric. Blocking makes it easier to put items together. Blocking shows off the patterning. Blocking makes the fabric bloom.
As a teacher, I feel passionately about blocking because I know how most knitters don't understand it, and don't feel confident about it.
Knitters hear about mats and wires and pins and get scared. It sounds hard. It's absolutely not, I promise!
My class very much focuses on a pragmatic approach to blocking. I provide easy ways to make your handknits look their best!
I'll show you how you can create amazing results with some water and a towel...
and maybe even a balloon....
But I do also talk about wires and mats and pins and when you need them, and how easy they actually are to use.
I'm so excited about it, I'm posting now, even though the class doesn't launch until Wednesday. In the meantime, I'm running a contest! Leave a comment here (before midnight EST Saturday the 5th of October) to win a free copy of the class. I'll randomly pick a number to choose a winner. (If you're commenting, make sure you log in so I know who you are, or leave me a clue to your email address, please.)
Tuesday, September 24, 2013
When the "F" in "FO" stands for "Funny"
I am highly amused by my most recent FO.
1 skein of Berroco Link, and 20mm (US size 35) needles. The yarn is a chain-knit wool and acrylic blend ribbon.
I realized that I needed to keep it simple, so I did. You can expect to see me wearing this a lot over the fall.
The world's most absurd length of i-cord makes the world's most excellent scarf/cowl.
1 skein of Berroco Link, and 20mm (US size 35) needles. The yarn is a chain-knit wool and acrylic blend ribbon.
The pattern is here. Cast on 4 stitches, and work in stockinette. You work a yarnover between the stitches, and drop them on the following row to make the stitches bigger. It's hysterical - looks to me like it was knitted with telephone poles. In fact, it looks to make like how a worsted-weight scarf would look on a Barbie doll. And it look about an hour to knit.
I was given the skein of yarn by someone who didn't know what to do with it. I didn't at first, either. I was trying to be clever, and everything I did just looked wrong.
I realized that I needed to keep it simple, so I did. You can expect to see me wearing this a lot over the fall.
Friday, September 20, 2013
Distracted-By-New-Yarn Syndrome
You've heard of Second Sock Syndrome, yes?
I have a bad case of it. I'm working on a design project right now, and I absolutely love how it's turning out. Normally I'm happy to work away on the second sock, but I caused myself a little problem last weekend, at the K/W Knitter's Fair.
For a variety of reasons, I've been working with lots of dark and subdued colours over the past few months.
I've finished up a new shawl design, in black, and I can't wear it, as I need to keep it pristine for use as a display sample. I like the shawl very much, and really really want to wear it.
So I decided to make one for myself.
Now it's well known that I wear a lot of black. What you may or may not know is that when I commit to a colour, I really commit. When I do go for a colour, I tend to go for bright.
I was walking past the Waterloo Wools booth at the Fair last weekend, and a skein of yarn practically leapt off the rack at me...
Highlighter. It's yellow. Bright yellow. BRIGHT yellow A variegated blend of bright and neon yellow.
I know. As I was fondling it, people kept walking by the booth saying things like "wow... that's bright". So of course I bought it.
I kept the skein on yarn on my desk as an encouragement. If I finish the sock I can make the shawl, I thought to myself.
Just to encourage me to make progress with the sock, on Tuesday I decided to wind up the skein into a ball. Just to see how it looked, you know.
And on Thursday afternoon, I achieved a writing objective, so I decide to cast on. Just so I could admire it. As you do.
And last night I made excellent progress on my sock.
As a reward, this morning on my commute to the Purl for a class, I decided to knit on the shawl a bit. Just a bit.
So yes, this shawl that I designed specifically to be knit in black? It's going to be in the most fantastically obnoxious variegated nearly-neon yellow in the world. AND I LOVE IT.
And the commissioned sock design I'm supposed to be working on? I have a new plan: an inch of sock gets me an inch of shawl.
Wish me luck.
Wednesday, September 18, 2013
Craft University: Socks for Beginners
Socks are my first knitting love, my true passion. If I had to give up all other kinds of knitting, I could happily knit only socks for the rest of my life.And I love teaching sock knitting. If I had to give up all other kinds of work, I could happily teach sock knitting for the rest of my life.
I teach sock knitting a lot locally, and I've been lucky enough to travel to a few great places to teach - but there are corners of the country, the continent, the world, that I haven't yet reached.
Well, thanks to Interweave, I'm now teaching sock knitting ALL OVER THE WORLD. Heck, I hear that they have internet access on the ISS, so I'll be able to teach sock knitting there, too.
My Sock Knitting for Beginners class launches on Interweave's new Craft University platform September 30th.
What's great about this class format is that it combines a number of different tools for teaching and learning. Each class has a written "lecture" in the form of notes and instructions. There's lots of pictures, and video demonstrations. There are detailed downloadable notes for every class. And you'll get to interact me, asking me questions as you go.
There are five lessons, and we work from the ground up, on top-down socks. (I feel pretty strongly that top-down socks are the best place for a new sock knitter to start.)
We use my training sock, and work through that in the class - everything from casting on, to working in the round, to turning the heel, to the gusset, to the foot, and right to decreasing and closing the toe.
Along the way, I share lots of tips and techniques
- how to work on DPNs & the best cast on for top-down socks
- how to fix a twisted round
- how to turn the heel without losing your mind (and a quick way to make sure that your stitches are safe if you do need to undo and rework it)
- an easy way to pick up stitches
- how to make sure socks fit well
- how to choose good sock yarn
- where to find good sock patterns
- my favorite sock knitting books
- what the deal is with Magic Loop and Two Circulars
If you've not worked top-down socks before, this class teaches you everything you need to know.
Come, join me!
Friday, September 13, 2013
What I'm Going to Be Up To This Fall
Some of the busy-ness this summer was prepping for activities this fall.
I love Fall - it's prime knitting and knitwear season! All those fantastic socks and fingerless mitts and sweaters. And all those fantastic events.
I'm teaching a fair bit.
There's my usual slate of classes at Lettuce Knit and The Purple Purl in Toronto.
And then, there's
The Needle Emporium, Ancaster, September 28
Creativ Festival, Toronto, October 24 and 25
KnitCity Vancouver, October 26 and 27
Interweave Knit Lab, San Mateo, October 30-November 2.
Shall We Knit, Waterloo, November 23 and 24
And then in the new year....
Vogue Knitting Live NYC, January 16-19, 2014.
The Cooperative Press Cruise, January 25-February 1, 2014. We'll be cruising the Eastern Caribbean.
Thursday, September 12, 2013
What I've Been Up To
I've been going through a phase of late where everything I do is "sooper sekrit".
I've been editing - the Deep Fall issue of Knitty, of course, which just launched yesterday, and a book or two.
I've been working on some designs. I've been working on videos. I'm working on some new classes.
And I've not been able to say anything about anything. It's driving me mad!
One thing I can talk about is that I was at Cleveland last week for a taping of Knitting Daily TV, with Vicki Howell.
The designs and one of the videos will shortly be public, so stay tuned for that. In the meantime, here are some hints...
If you're attending the KW Knitter's Fair this Saturday, you might spot me sporting one of these new designs...
Saturday, August 17, 2013
Following up: On Working Two at Once
As with working on two circulars, I've also written on the topic of working two socks at the same time, in the Summer 2013 issue of Sockupied.
Here's a quick summary of the process: The two socks sit side-by-side on two circular needles.
(My usual stellar photography...)
And you work as follows: across the first half of the first sock (green in the photo), across the first half of the second sock (white in the photo), across the second half of the second sock (white in the photo), across the second half of the first sock (green in the photo).
As labelled:
So once you're cast on, it's simple! No pattern mods required. Just keep track of which side you're on. I tend to use removeable stitch markers or safety pins to keep track of which sock is which - a green marker on the first sock, an orange marker on the second.
(As for casting on, I usually cast them on separately and slip them to two needles in the setup above.
Turning the heel is easy: work them one at a time! Really!
I do know knitters who separate the socks for turning the heel and picking up the gusset stitches. That can make it easier to visualize and set up.
The only tricky bit is the gusset pick up: it has to be done in two steps. With the first needle, finish the heel on the first sock, and pick up the sts on the first side of the heel. Then turn the heel on the second sock, and with that same needle pick up the heel on the first side of the second sock. Then with the second needle, work across the instep of the second sock, then the first. Then back to the first needle, and pick up the second half of the gusset on the first sock, work across the rest of the sole. And lastly, with that same needle, pick up the second half of the gusset on the second sock, and work across the rest of the sock.
It seems odd at first, but if you think through it, it's actually pretty logical. It's exactly how you do it for a single sock: first side of gusset pickup, work across instep sts, then second side of gusset sts. It's all about keeping the sole stitches grouped together on one needle, and the instep sts grouped together on the other.
And then once that's done, it's easy!
Subscribe to:
Posts (Atom)